如何在MACOS中將 NTFS格式的 Pegasus3轉換成Jurnaled HFS+
Formatting NTFS Volume with Disk Utility
1. Download the latest Pegasus3 macOS Driver by visiting our Promise Support Download Page and select the Pegasus3 to access the Pegasus3 Symply Edition Series.
2. Note: Any of the PegasusR(x) Symply Editions all use the same driver for macOS. The driver is fully compatible for both Pegasus3 Symply Editions and Pegasus3 PC Editions.
Direct Download to Driver Version 6.2.3
3. After you’ve downloaded the R_MacDrv_V6.2.3-2.zip, proceed in uncompressing the zip file.
4. Navigate to R_MacDrv_V6.2.3-2 folder that was extracted from the zip folder and locate R_MacDrv_V6.2.3-2.pkg.
5. Double click on R_MacDrv_V6.2.3-2.pkg to run the installer.
6. Depending on your macOS Security & Privacy Settings, you may be prompted with the following message:
7. Go to System Preferences > Security & Privacy Settings
8. In Security & Privacy, you will receive a message under the section:
Allow apps downloaded from:
“R_MacDrv_V6.2.3.pkg" was blocked from opening because it is not from an identified developer.
9. You will receive the following message below. Click Open to confirm that you want to install the Pegasus3 driver.
10. Once the installation begins, and you have continued to the Installation Type section of the installation, you will need to enter the administrator account credentials in order to install the driver.
11. After finishing the installation process of the Pegasus3 Driver, the installer will prompt you to restart your computer. This will also restart your Pegasus3.
12. After restarting your computer and Pegasus3, you will see the NTFS (New Technology File System) formatted volume on your Desktop. Mac OS X kernels also have a limited ability to read NTFS as well limited built-in write support. There are 3rd-party drivers that allow OS X to Read and Write to NTFS volumes. Promise in no shape or form is responsible for volumes that were left formatted NTFS and were used on OS X by 3rd-party NTFS drivers.
We do not qualify or test 3rd-party NTFS drivers by any software vendor/manufacturer that develops and distributes for OS X.
The NTFS volume mounted on your Desktop will be read-only until you reformat it to Journaled HFS+.
13. Open Disk Utility /Applications/Utilities/Disk Utility.app
14. Under the External Drive Device Tree, locate PromiseRAID ⏏
15. Click Erase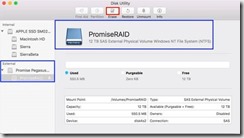
16. Type the desired Volume Name and select the Format type to be Mac OS Extended (Journaled).
17. Click Erase to format the volume.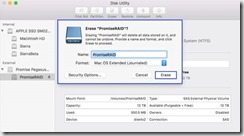
Formatting NTFS Volume with Promise Utility
1. Open the Promise Utility.
2. Unlock the pad lock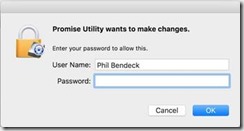
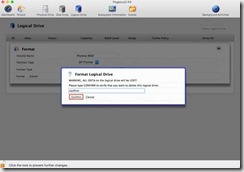
3. Navigate to the Logical Drive Icon and click the Format icon.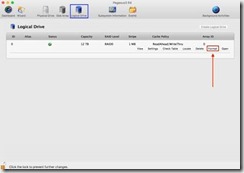
4. In the Format dialogue, type the desired Volume Name.
5. Partition Type = GPTFormat
6. Format Type = Journaled HFS+
7. Click on Format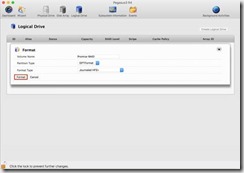
8. After clicking Format, you will receive the message illustrated below. Type “Confirm" and then click Confirm to execute the format process.