Installation of the Symantec Protection Engine – Graphical Steps Symantec Connect Community

http://www.symantec.com/connect/articles/installation-symantec-protection-engine-graphical-steps


On the previous article:

https://www-secure.symantec.com/connect/articles/i…

we made a basic introduction to Symantec Protection Engine. In this article, we will go through the installation of the SPE.

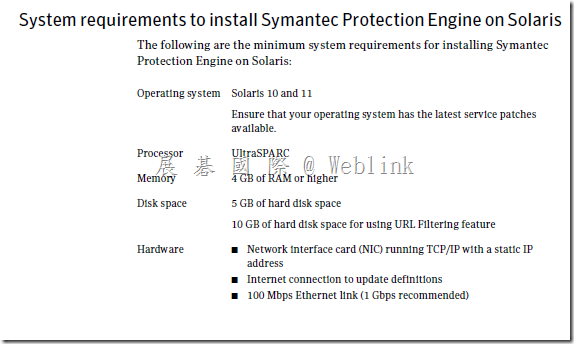
Before the installation of the SPE, you need to make sure the JRE installed. And, please note that the SPE only support 32bit JRE.

1. Start the installation:

clip_image001

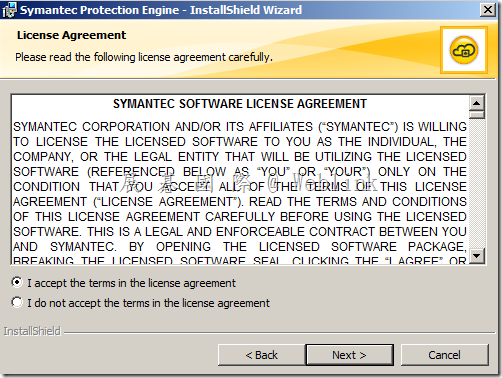
2. Accept the license:

clip_image002

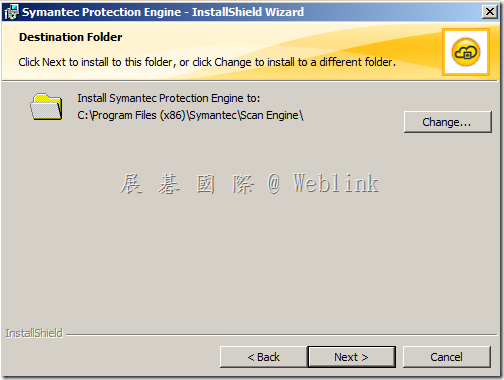
3. The installation location:

clip_image003

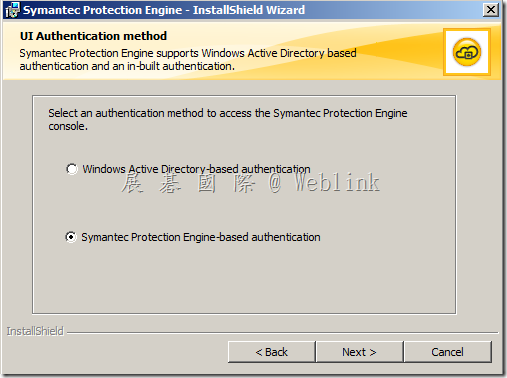
4. Select the authentication method:

clip_image004

From the new version of the SPE on, it supports Active Directory-based authentication.

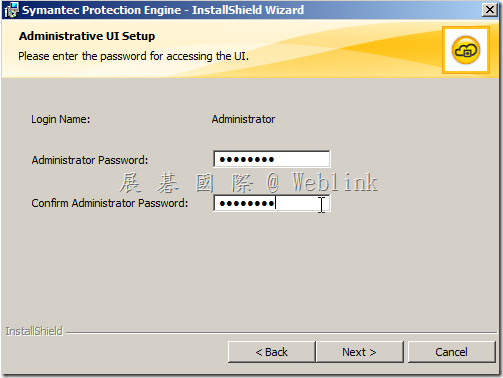
5. Input the password of the administrator:

clip_image005

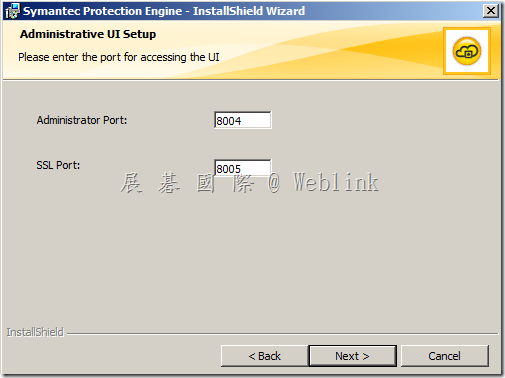
6. Accept the administrator port and SSL port:

clip_image006

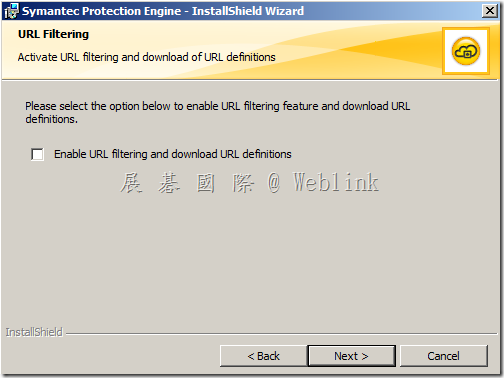
7. URL filtering option:

clip_image007

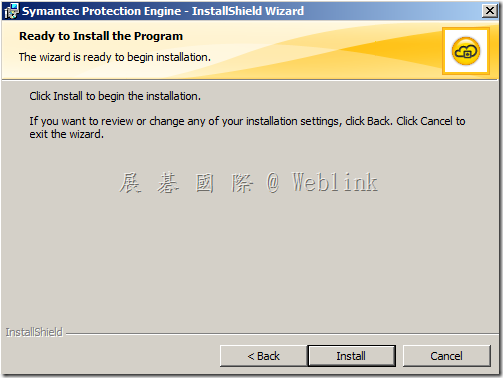
8.Start the installation:

clip_image008

9. Finish the installation:

clip_image009

10. Launch IE and browse to https://localhost:8004

clip_image010

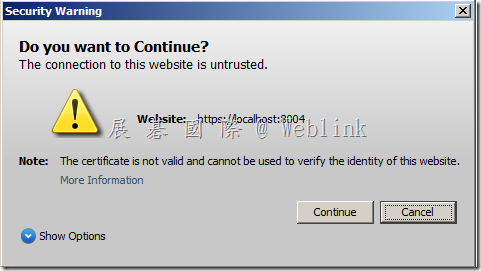
11. On the Security Warning windows, click ‘Continue’ button:

clip_image011

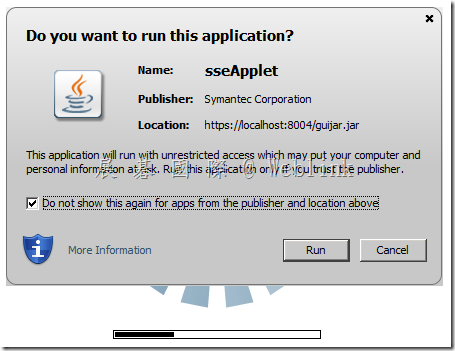
12. On the applet windows, click ‘Run’ button:

clip_image012

13. On the Security Warning windows, click ‘Don’t Block’ button:

clip_image013

14. Input the administrator credential:

clip_image014

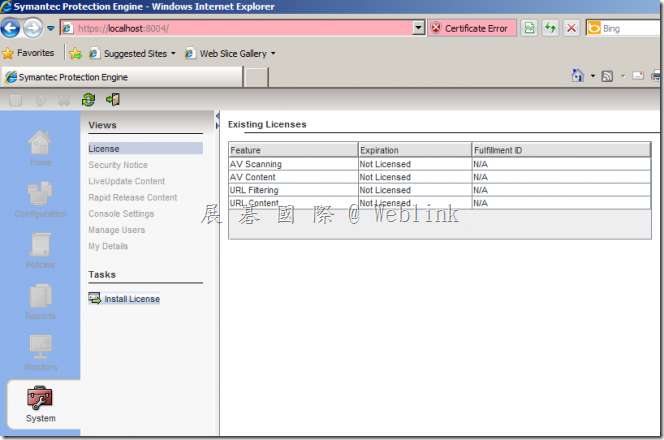
15. You need to install license to enable the SPE:

clip_image015

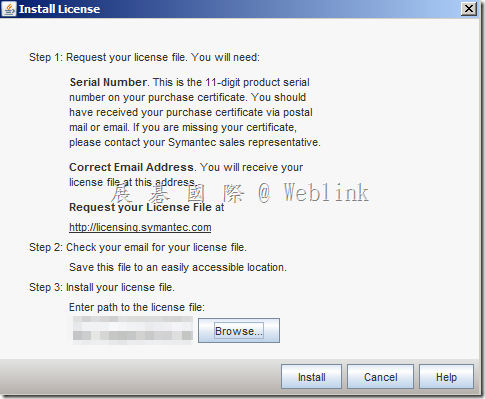
16.Install your license:

clip_image016

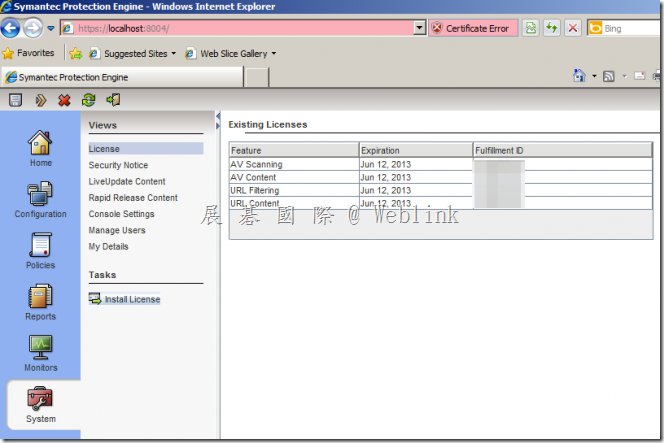
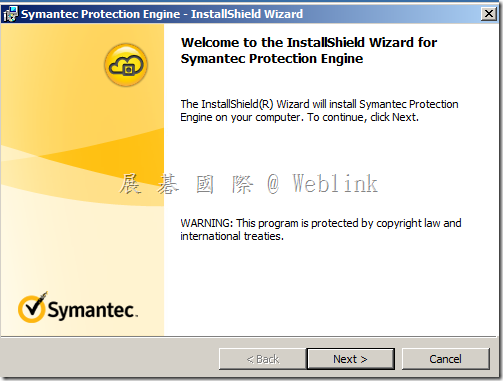
17. The function of the SPE will be enabled after install the license:
clip_image017

【 AntiVirus for Network Attached Storage ( Symantec Scan Engine for NAS )】簡介

About【 AntiVirus for Network Attached Storage ( Symantec Scan Engine for NAS )】


一、建置

1.先確定客戶的 NAS 支援 【 AntiVirus for Network Attached Storage】

如果支援

先在 NAS 上安裝 connector ( 很多 NAS 出廠時就已預載 connector )

2.找一台 server 來安裝 Symantec Scan Engine

3.透過 Web UI 設定 Symantec Scan Engine

( 包含:Symantec Scan Engine 與 NAS 聯繫的 protocol → RPC 或 ICAP,以及一些 protocol 選項 )

4.設定每個 NAS 的掃描選項

二、運作

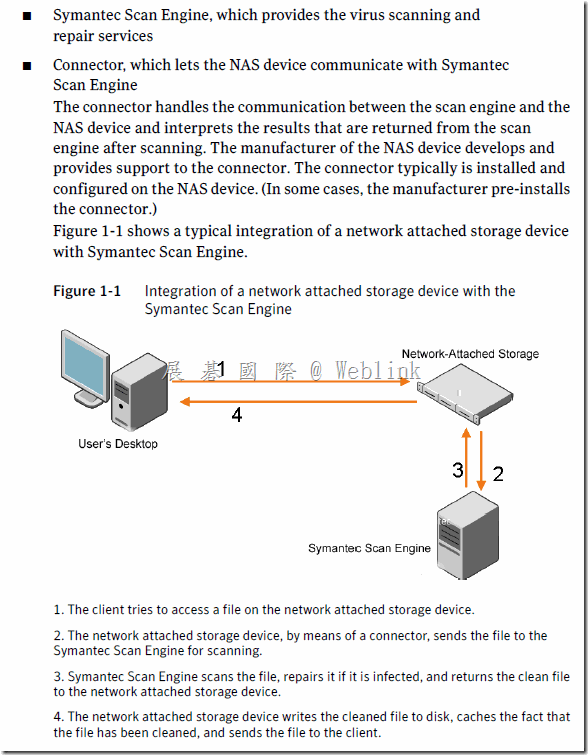
1.user 向 NAS 要求檔案

2. NAS 透過 connector 將檔案送至 Symantec Scan Engine 掃描

3.Symantec Scan Engine 掃描後,如果偵測到病毒,會將病毒清除,然後將乾淨的檔案送還 NAS

4.NAS 將乾淨的檔案寫入硬碟 (並標記檔案已清除),然後將檔案提供給 user

clip_image001

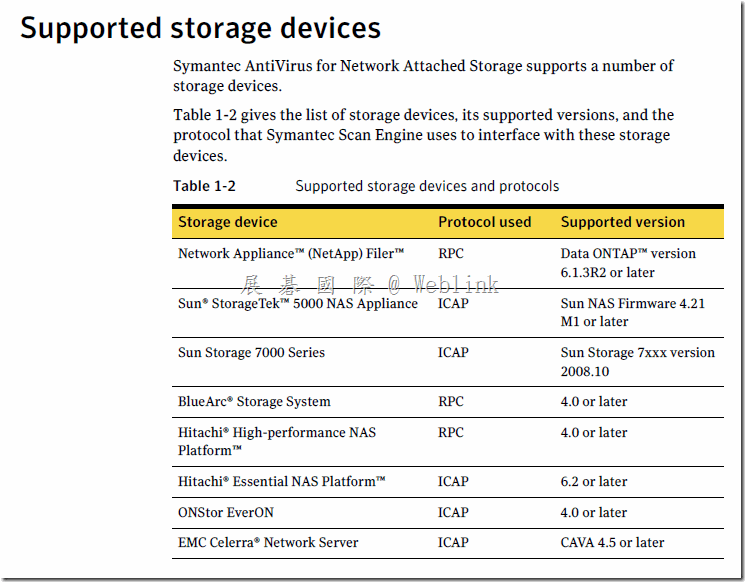
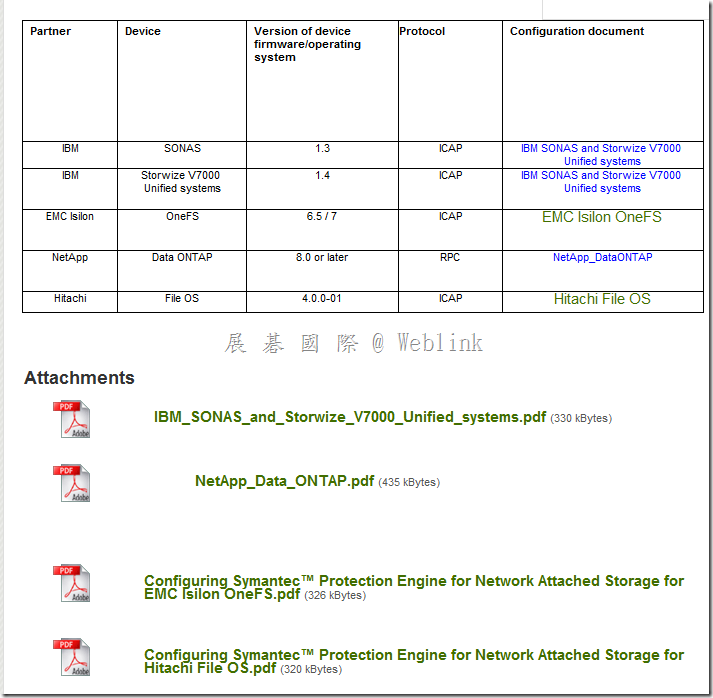
三、支援的 NAS 與 connector 使用的 protocol

※ 如果 connector 使用的 protocol 是 RPC,Symantec Scan Engine 就只支援 Windows 平台

clip_image002

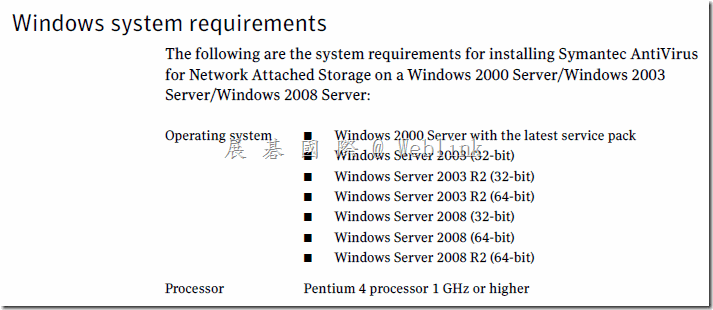
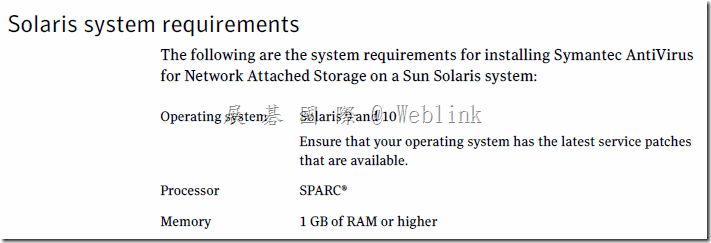
四、Symantec Scan Engine 支援的系統

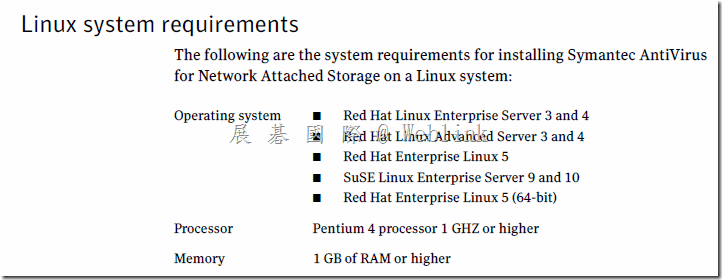
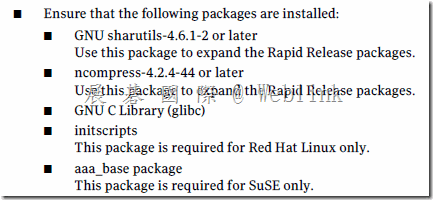
支援 Windows、Solaris、Linux

※ 如果 connector 使用的 protocol 是 RPC,Symantec Scan Engine 就只支援 Windows 平台

clip_image003
clip_image004
clip_image005
clip_image006

【 Symantec Protection Engine for NAS 7.0】簡介

About【 Symantec Protection Engine for NAS 7.0】

一、建置

1.先確定客戶的 NAS 支援 【 Symantec Protection Engine for NAS 7.0】

如果支援

先在 NAS 上安裝 connector ( 很多 NAS 出廠時就已預載 connector )

2.找一台 server 來安裝 Symantec Protection Engine

3.透過 Web UI 設定 Symantec Protection Engine

( 包含:Symantec Protection Engine 與 NAS 聯繫的 protocol → RPC 或 ICAP,以及一些 protocol 選項 )

4.設定每個 NAS 的掃描選項

二、運作

1.user 向 NAS 要求檔案

2. NAS 透過 connector 將檔案送至 Symantec Protection Engine 掃描

3. Symantec Protection Engine 掃描後,如果偵測到病毒,會將病毒清除,然後將乾淨的檔案送還 NAS

4.NAS 將乾淨的檔案寫入硬碟 (並標記檔案已清除),然後將檔案提供給 user

clip_image001

三、支援的 NAS 與 connector 使用的 protocol

※ 如果 connector 使用的 protocol 是 RPC,Symantec Protection Engine 就只支援 Windows 平台

【Support Matrix for Partner Devices Certified with Symantec Protection Engine (SPE) for Network Attached Storage (NAS) 7.0.x】

http://www.symantec.com/business/support/index?page=content&id=HOWTO83461

clip_image002

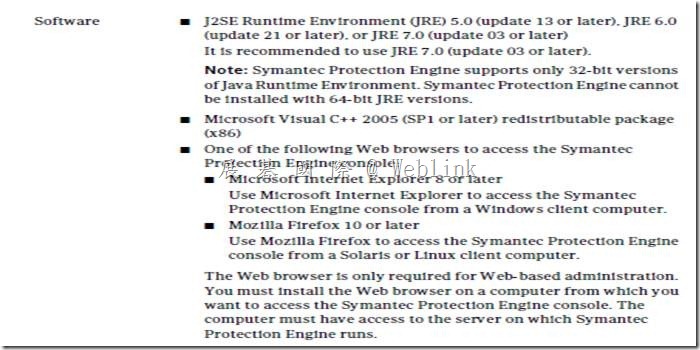
四、Symantec Protection Engine 支援的系統

支援 Windows、Solaris、Linux

※ 如果 connector 使用的 protocol 是 RPC,Symantec Protection Engine 就只支援 Windows 平台

clip_image003

clip_image004

clip_image005


clip_image006


clip_image007

clip_image008