【[ PGP 全硬碟加密 ]..同一台 NB 若有多人使用不同網域使用者帳戶登入使用,若首位使用者安裝、註冊、加密硬碟後,其他使用者是否可以正常使用該NB】

【[ PGP 全硬碟加密 ]..同一台 NB 若有多人使用不同網域使用者帳戶登入使用,若首位使用者安裝、註冊、加密硬碟後,其他使用者是否可以正常使用該NB】

Ans:首位使用者安裝、註冊、加密硬碟後,其他使用者仍然可以正常使用該NB

1. 首位使用者已完成安裝、註冊、加密硬碟

clip_image002

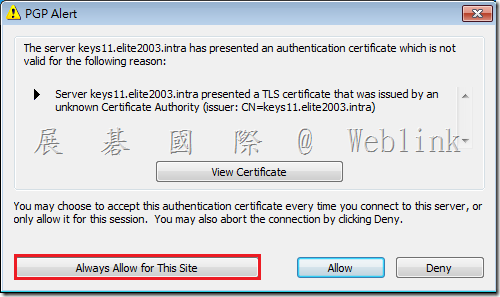
2. 登出第一位使用者,然後以第二位使用者的帳號登入,登入後出現以下畫面,請按下【Always Allow for This Site】

clip_image003

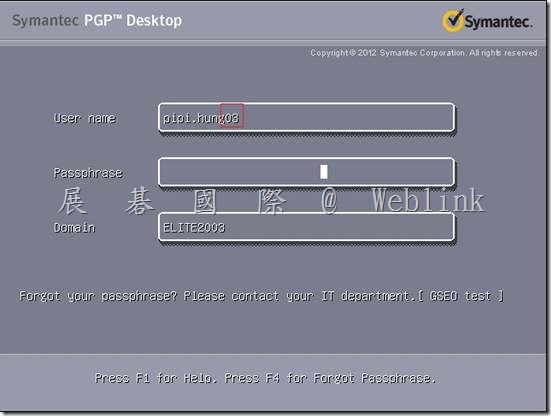
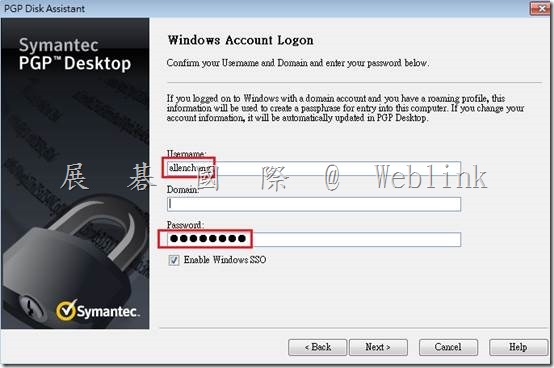
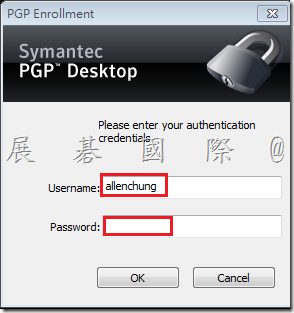
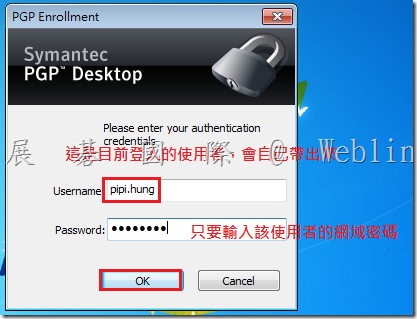
3. 以下畫面中,登入的使用者帳戶名稱會自動帶出來,請輸入該使用者的網域密碼

clip_image004

4. 註冊完成,PGP正常運作,不會再進行硬碟加密 (因為首位使用者已加密完成)

clip_image005

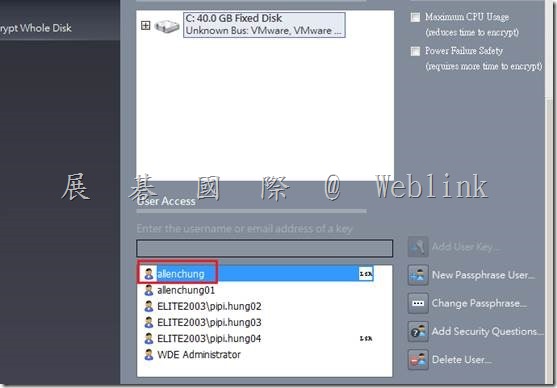
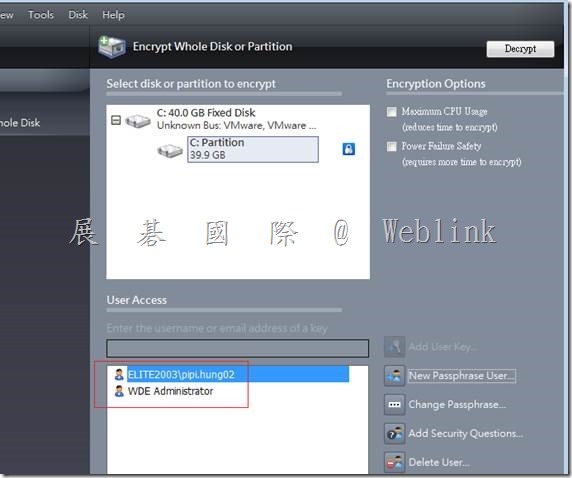
5. 開啟用戶端 PGP 管理畫面,可以看到第二位使用者帳戶已自動加入全硬碟加密使用者中

clip_image007

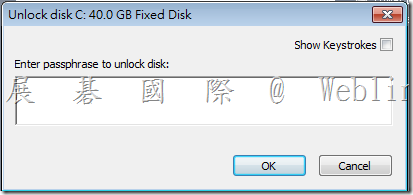
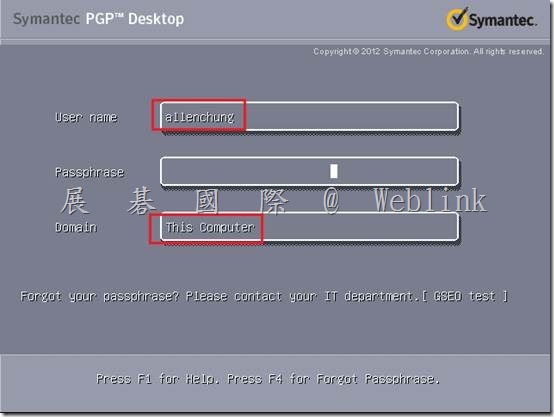
6. 重新啟動電腦,以第二位使用者帳戶、密碼仍然可以成功登入

clip_image009

如果您想要讓本機使用者的帳號、密碼也可以登入 PGP BootGuard,請您在用戶端全硬碟加密頁面中,按下右方【New Passphrase User】

詳細步驟如下:

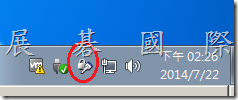
1. 點選桌面右下方 PGP icon,並按下【Open PGP Desktop ( Symantec Drive Encryption )】

clip_image010

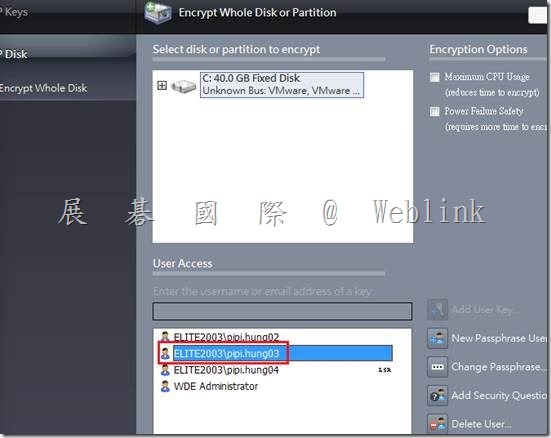
2. 點選【Encryption Whole Disk】,並按下右方【New Passphrase User】

clip_image012

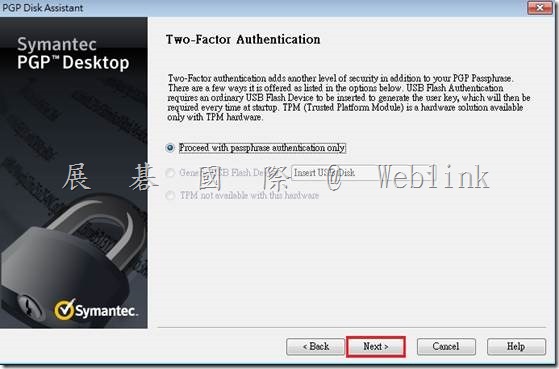
3. 點選【Use Windows Password】,並按下【Next】

clip_image014

4. 按下【Next】

clip_image016

5. 在此頁面入目前已存在的本機帳戶與密碼,並按下【Next】

clip_image018

clip_image020

6. 再輸入一次密碼

clip_image021

7. 本機帳戶已出現在Encrypt Whole Disk User 中

clip_image023

8. 本機帳戶可成功登入 BootGuard

clip_image025

9. 因為是集中控管的 PGP client,所以進入 Windows 後會出現註冊畫面,由於設定為整合 AD 驗證,此處不能輸入本機帳戶與密碼,必須輸入網域使用者與密碼

clip_image026

【Symantec Drive Encryption (原 PGP Whole Disk Encryption) 用戶端硬碟加密前的前置作業】

原廠原始文件連結

Enterprise Support – Symantec Corp. – Best Practices Symantec Drive Encryption

http://www.symantec.com/business/support/index?page=content&id=TECH149543

【說明】

1. 以下內容提供使用者在使用【賽門鐵克Symantec Drive Encryption (原 PGP Whole Disk Encryption)】來進行硬碟加密保護前建議確認與施作的相關項目

2. 建議確認與施作的相關項目可確保硬碟加密過程順利;以及加密作業完成後,系統依然能穩定地操作使用

【建議確認與施作的相關項目】

1. 確定目標硬碟是否支援

【支援的硬碟類型】

  • l 桌上型或筆記型電腦的硬碟,包含 SSD (solid-state drive),可加密分割區或整顆硬碟
  • l 支援 04(FAT16)、06(FAT16B)、07(NTFS)、0B(FAT32) 硬碟格式
  • l Windows 7 、Windows 8 、Windows 8.1 UEFI 系統僅支援 x64 系統 (硬體需為微軟 Windows 7 、Windows 8 、Windows 8.1 certified 過),並且 Symantec Drive Encryption 需為 10.3.2 (含)以上
  • http://www.symantec.com/business/support/index?page=content&id=TECH203071
  • l 開機磁區若為 GPT 格式,該硬碟僅允許一個 UEFI 系統磁區存在
  • l 開機磁碟不支援 RAID 或 LVM (Logical Volume Managers)
  • l 不支援不含有線鍵盤的平板或系統

【不支援的硬碟類型】

  • l Dynamic disks
  • l SCSI / SAS drives 或 controller
  • l Software RAID disks
  • l exFAT 格式
  • l 開機磁區與系統磁區不在同一顆硬碟

2. 確認作業系統是否支援

  • l Windows 8 (8.1) 企業版(32位和64位版本)
  • l Windows 8 (8.1) 專業版(32位和64位版本)
  • l Windows 7(所有32位和64位版本,包括Service Pack 1)
  • l Windows XP專業版32位(Service Pack 2或3)
  • l Windows XP專業版64位版(Service Pack 2)
  • l Windows XP家用版(Service Pack 2或3)
  • l Windows Vista(所有32 – 位和64位版本,包括Service Pack 2)
  • l Windows Server 2003(Service Pack 1和2)
  • l Windows Server 2003 SP2(32位和64位版本)
  • l Windows Server 2008的SP1&SP2
  • l Windows Server 2008 R2(64位)

3. 確認鍵盤的支援

請確認您使用的鍵盤支持的語言,支持的語言的列表,請參考以下URL:

  • l Windows

http://www.symantec.com/business/support/index?page=content&id=TECH149728

  • l Mac OS X

http://www.symantec.com/docs/TECH149729

4. 進行硬碟加密前請先備份系統

進行硬碟加密前請先進行系統備份或重要資料備份,避免加密後系統無法正常開機或硬碟無法解密

  • l Windows 7 的備份、還原可參考以下微軟官網URL step by step 的操作

一點通 – 如何完整備份與還原 Windows 7

http://support.microsoft.com/kb/2138292/zh-tw

  • l Windows 8、Windows 8.1的備份、還原可參考以下URL

使用Windows 8.1內建工具來備份系統 (文件來源:iThome Download)

http://download.ithome.com.tw/article/index/id/2192

  • l 或是採購 Symantec System Recovery 來進行備份
  • 註:Windows 8、Windows 8.1 的備份

clip_image002 clip_image004

5. 進行硬碟加密前請先確認硬碟是否有壞軌,並請進行磁碟重組

  • l 使用未受控管的模式在用戶端安裝Symantec Drive Encryption,加密的過程若是遇到壞軌,預設加密的程序會暫停
  • l 使用受主控台控管的模式在用戶端安裝Symantec Drive Encryption,加密的過程若是遇到壞軌,系統會將此事件紀錄至主控台事件中,但加密的程序會繼續運作
  • l 可使用 chkdsk C: /F chkdsk C: /R (修復)

clip_image005

  • l 或使用 SpinRite、Norton Disk Doctor 來嘗試確認與修復
  • l 可透過【系統工具】→【磁碟重組工具】來進行磁碟重組

參考網址:

http://blog.xuite.net/yh96301/blog/34330846-Windows+7+%E7%A3%81%E7%A2%9F%E6%B8%85%E7%90%86%E8%88%87%E7%A3%81%E7%A2%9F%E9%87%8D%E7%B5%84

6. 建立復原光碟 (Recovery CD)

7. 請確保加密的過程中電力不中斷

  • l 筆記型電腦請使用 AC 電源
  • l 管理者請在主控台政策中勾選【Force power failure safety】

clip_image007

8. 請確認筆記型電腦【電源選項】不使用休 (睡) 眠或其他相關的省電模式

  • l 筆記型電腦休眠或其他相關的省電模式可能會延長或中斷硬碟加密的操作過程
  • l 為了確保最大速度加密,我們建議改變【電源選項】不使用休 (睡) 眠

clip_image009

9. 大量佈署前,請先進行少數電腦的佈署測試,確認是否有軟體衝突或不相容的狀況發生

以下軟體與Symantec Drive Encryption不相容:

  • l Faronics Deep Freeze (任何版本)
  • l Utimaco Safeguard Easy 3.x
  • l Absolute Software’s CompuTrace laptop security and tracking product. Drive Encryption is compatible only with the BIOS configuration of CompuTrace. Using CompuTrace in MBR mode is not compatible.
  • l Hard disk encryption products from GuardianEdge Technologies: Encryption Anywhere Hard Disk and Encryption Plus Hard Disk products, formerly known as PC Guardian products

以下程式與Symantec Drive Encryption並存在同一系統上,會block Symantec Drive Encryption的功能:

  • l Safeboot Solo
  • l SecureStar SCPP10

10. 如果可以的話,請您在硬碟加密完成後立即進行以下的硬碟解密測試 (擇1)

  • l 透過用戶端Symantec Drive Encryption介面來解密硬碟 (如果管理政策允許您解密)

clip_image011

  • l 使用 bootg.iso 開機來解密硬碟

clip_image013

  • l 將加密硬碟外接到另一台有安裝過Symantec Drive Encryption的電腦,會跳出如下畫面輸入密碼,若輸入完成後就可以正常讀取裡面資料

clip_image014

  • l 將加密硬碟外接到另一台有安裝過Symantec Drive Encryption的電腦,使用解密指令來進行硬碟解密

解密指令

c:\program files (x86)\pgp corporation\pgp desktop\pgpwde.exe –enum (確認 Disk 編號)

c:\program files (x86)\pgp corporation\pgp desktop\pgpwde.exe –status (確認 Disk 加密狀態)
c:\program files (x86)\pgp corporation\pgp desktop\pgpwde.exe –disk X –fixmbr –passphrase <passphrase> (解密硬碟,X 是 disk 編號)

clip_image016

  • l 註:【PGP command line】

clip_image018

【PGP msi 派送與用戶端註冊 ( 測試成功之…..細部設定 )】

【PGP  msi 派送與用戶端註冊 ( 測試成功 )】

需要整合 AD 驗證,也用到 memberOf 這個屬性,這樣 user 才不會跑到 default group,也就不會沒套到 silent Enrollment

clip_image015

clip_image016

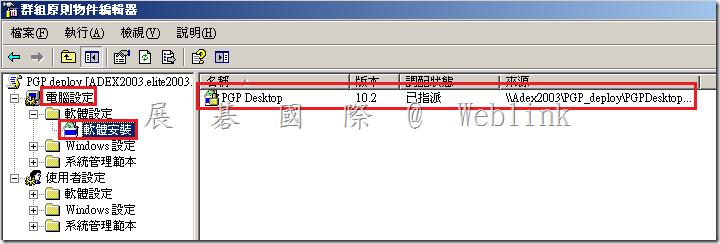
1. 我今天透過群組原則的【軟體安裝】(套在電腦上,這樣沒有安裝權限的問題)

clip_image017

2. 重開機後,會發現用戶端機器開機後,沒有到登入畫面就又重開了 ( 因為剛剛套用群組原則,安裝了 PGP client msi後隨即重開機 )

所以,【第一部分 (PGP client msi 安裝)】就自動做好了

3. 重開機後,只要進行以下兩個畫面

clip_image018

clip_image019

然後就自己做加密了

clip_image020


【詳細的設定如下】

1. 先建立一個安全性通用群組

2. 然後將要使用 PGP Full Disk 的 user 通通加入此群組

clip_image001

該LAB gseo_group 的 CN name 如下:

CN=gseo_group,OU=PGP_GSEO,DC=elite2003,DC=intra

3. 接著,請至【Consumers】→【Group】→【找到要修改屬性的群組 或 新建一個群組】雙按此群組

clip_image002

4. 點按下方的【Group Settings】

clip_image003

5. 點選【Membership】

勾選【Match Consumers Via Directory Synchronization】

選擇【If all of the following apply】

Attribute 輸入 【memberOf】,Value 輸入【Group 的 CN name】

CN=gseo_group,OU=PGP_GSEO,DC=elite2003,DC=intra

clip_image004

或是

1. Attribute 欄位請輸入【OU】

2. Value 欄位請輸入OU 的 值或關鍵字,例如:【OU=PGP_OU_2】

3. 一定要勾選【Regular Expression】

image

image

6. 參考以下網頁,確認 AD 整合驗證的相關設定

http://www.wellife.com.tw/symantec/?p=4679

重點如下

(1) 確認使用 AD 驗證

clip_image005

clip_image006

(2) 確認註冊是採用 silent 模式

clip_image007

clip_image008

clip_image009

(3) 確認全硬碟加密的 policy 設定

clip_image010

(4)

clip_image011這個不要勾選

clip_image012

(5) 確認上方 policy 是套用給該 group

clip_image013

群組原則中 32位元的軟體封裝,不要勾選【讓這個32位元x86應用程式可以在win65電腦上執行】

clip_image014

【SEP12 如何解決 Hardware ID 重複的問題】

【SEP12 如何解決 Hardware ID 重複的問題】

請參考以下 KB

【Duplicate Hardware IDs result in only one client showing up in the Symantec Endpoint Protection Manager for multiple systems】

http://www.symantec.com/business/support/index?page=content&id=TECH97626

【詳細步驟如下】

1. 在所有重複的用戶端停止 SMC 服務

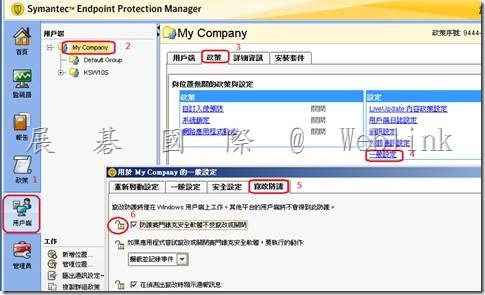
請先停用【竄改防護】→取消勾選【防護賽門鐵克安全軟體不受竄改或關閉】

clip_image002

※ 如果無法停用【竄改防護】,必須至 SEPM 管理主控台進行設定

鎖頭不要上鎖,用戶就可以停用【竄改防護】

clip_image004

請按鍵盤上【Windows 鍵】+【R鍵】→會跳出【執行】視窗

※ XP 請按【開始】→【執行】

在出現的視窗中,輸入【smc –stop】,並按下【確定】

clip_image005

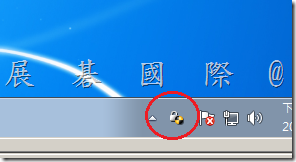
此時,您會發現右下角SEP12防毒軟體盾牌不見了

服務中的【Symantec Endpoint Protection】【Symantec Management Client】也停止了

clip_image006

2. 在 SEPM 刪除重複的用戶端

3. 開啟用戶端登錄編輯程式

clip_image007

開啟至以下位置

HKLM\Software\Symantec\Symantec Endpoint Protection\SMC\Sylink\Sylink

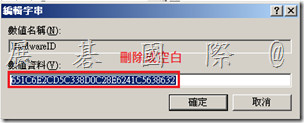
4. 在右方找到 HardwareID,雙按 HardwareID

clip_image009

HKLM\Software\Wow6432Node\Symantec\Symantec Endpoint Protection\SMC\Sylink\Sylink

image

將 HardwareID 值刪除成空白

clip_image010

5. 在所有重複的用戶端將 sephwid.xml 更名為 sephwid.xml.bak

SEP 11 Location: 

C:\Program Files\Common Files\Symantec Shared\HWID

     SEP 12.1 Location: 
        Windows XP/2003: C:\Documents and Settings\All Users\Application Data\Symantec\Persisted Data
        Windows Vista/7/2008: C:\Program Data\Symantec\Symantec Endpoint Protection\Persisted Data

Windows 2008R2

C:\Documents and Settings\All Users\Application Data\Symantec\Symantec Endpoint Protection\PersistedData

Symantec\Symantec Endpoint Protection

clip_image011

C:\Users\All Users\Symantec\Symantec Endpoint Protection\PersistedData

image

6. 請到【服務】→【Symantec Endpoint Protection】→右鍵【啟動】

clip_image012

此時,您會發現右下角SEP12防毒軟體盾牌又出現了

服務中的【Symantec Endpoint Protection】【Symantec Management Client】也啟用了

7. 別忘了再將【竄改防護】項目勾回

clip_image014

9.  在SEPM 主控台確認電腦均報到回 SEPM,並且有各自的 HardWare ID

補充:

【Enterprise Support – Symantec Corp. – How to repair duplicate IDs on cloned Symantec Endpoint Protection 12.1 clients】

http://www.symantec.com/business/support/index?page=content&id=TECH163349

【Enterprise Support – Symantec Corp. – How to prepare a Symantec Endpoint Protection 12.1.x client for cloning】

http://www.symantec.com/business/support/index?page=content&id=HOWTO54706

【SEP12 如何手動移除各種 log files 讓用戶端管理介面各種日誌清空】

【SEP12 如何手動移除各種 log files 讓用戶端管理介面各種日誌清空】

手動移除各種 log files 讓用戶端管理介面各種日誌清空,必須以本機系統管理員群組的成員登入

各種日誌檔存放於以下兩個目錄

【C:\ProgramData\Symantec\Symantec Endpoint Protection\12.1.671.4971.105\Data\Logs】

clip_image002

【C:\ProgramData\Symantec\Symantec Endpoint Protection\12.1.671.4971.105\Data\Logs\AV】

clip_image004

步驟:【SEP12 用戶端如何手動移除各種 log 檔,讓用戶端介面上的各種日誌清空】

打開 SEP12 用戶端管理介面,發現有各項的日誌存在(例如:風險日誌)

clip_image005

以 Windows 7 為例

請先停用【竄改防護】→取消勾選【防護賽門鐵克安全軟體不受竄改或關閉】

clip_image007

※ 如果無法停用【竄改防護】,必須至 SEPM 管理主控台進行設定

鎖頭不要上鎖,用戶就可以停用【竄改防護】

clip_image009

請按鍵盤上【Windows 鍵】+【R鍵】→會跳出【執行】視窗

※ XP 請按【開始】→【執行】

在出現的視窗中,輸入【smc –stop】,並按下【確定】

clip_image010

此時,您會發現右下角SEP12防毒軟體盾牌不見了

服務中的【Symantec Endpoint Protection】【Symantec Management Client】也停止了

clip_image011

接著,請刪除以下兩個目錄中的 log 檔

【C:\ProgramData\Symantec\Symantec Endpoint Protection\12.1.671.4971.105\Data\Logs】

clip_image002[1]

【C:\ProgramData\Symantec\Symantec Endpoint Protection\12.1.671.4971.105\Data\Logs\AV】

clip_image004[1]

請到【服務】→【Symantec Endpoint Protection】→右鍵【啟動】

clip_image012

此時,您會發現右下角SEP12防毒軟體盾牌又出現了

服務中的【Symantec Endpoint Protection】【Symantec Management Client】也啟用了

再次打開 SEP12 用戶端管理介面,發現有各項的日誌已不存在(例如:風險日誌、掃描日誌)

clip_image013

clip_image014

別忘了再將【竄改防護】項目勾回

clip_image016

安裝 DLP Endpoint Agent 12.0.1 後 IE temp 目錄下產生了很多 DLP*.TMP 檔 造成 IE 開啟緩慢

image

  • 【安裝 DLP Endpoint Agent 12.0.1 後 IE temp 目錄 下產生了很多 DLP*.TMP 檔 造成 IE 開啟緩慢】

Example:Windows 7、Windows 8、Windows 8.1 目錄

(C:\Users\ [登入名稱] \AppData\Local\Microsoft\Windows\Temporary Internet Files)

  • 刪除 DLP*.TMP 後,IE 開起即恢復正常,但之後 DLP*.TMP 又會產生


  • 已確認此現象與 C:\Program Files\Manufacturer\Endpoint Agent\temp" file 過大無關


  • Forum 提到:這是一個 Symantec 目前已經發現的問題,不過 fix 檔目前沒有公開,需建案取得相關的 fix

以下是 Forum 的連結與內容 

http://www.symantec.com/connect/forums/dlp-endpoint-crea-demasiados-archivos-temporales-en-carpeta-temp

  • 請下載 Hotfix_12.0.1101_Windows.zip ,解壓後參照 Hotfix Readme 來執行用戶端 Endpoint Agent 的升級


  • Hotfix Readme

Fixes in this Hotfix:
———————
3411202 : Dlp temp files created by IE HTTPS hook are not deleted after scanning

    More infomation :
    The internet explorer hook generates false requests that never make it to agent. As agent is supposed to delete the requests, the temporary files created for those requests are never deleted.

     
    Contents:
    ————
    AgentInstall.msi
    AgentInstall64.msi
    Agent Tools (not listed here)
     
     
    Constraints:
    ————
    1. This hotfix can only be installed in place of Endpoint Agent 12.0.1. Also it is to be used with a 12.0.1 server.
    2. These files are from the Endpoint Agent 12.0.1 hotfix build 12.0.1101.01001


    To Install the Endpoint Agent Hotfix:
    —————————————-
     
    1. Find the appropriate Agent to install (in /Endpoint/Win32/ or /Endpoint/x64/)
     
    2. In the Software Distribution package give the following command line for fresh installation of DLP agent (新安裝的用戶)

    msiexec /i AgentInstall.msi /q INSTALLDIR="%ProgramFiles%\Manufacturer\Endpoint Agent\" ENDPOINTSERVER="hostname" PORT="8000″ KEY="" SMC="hostname" SERVICENAME="EDPA" WATCHDOGNAME="WDP"
     
    3. If you want to upgrade agent from 12.0.1 then in software distribution package command line you need to give following (已安裝的用戶)

    msiexec /i AgentInstall.msi /q INSTALLDIR=“%ProgramFiles%\Manufacturer\Endpoint Agent\" ENDPOINTSERVER="hostname" PORT="8000″ KEY="" SMC="hostname" SERVICENAME="EDPA" WATCHDOGNAME="WDP" REINSTALL=ALL REINSTALLMODE=vomus

SEE Full Disk and SEE SKU 已於 2013/07/01 EOL (請注意替代的 SKU 名稱)

Enterprise Support – Symantec Corp. – FAQ for Replacement of Symantec Endpoint Encryption SKUs with “FlexChoice” SKUs

http://www.symantec.com/business/support/index?page=content&id=TECH208008

1. SEE Full Disk and SEE SKU 已於 2013/07/01 EOL (請注意替代的 SKU 名稱)

(1) SEE Full Disk 取代的 SKU 是 Symantec Drive EncryptionFlexChoice with Encryption Server Limited Powered by PGP Technology

(2) SEE          取代的 SKU 是 Symantec Drive and Removable Storage EncryptionFlexChoice with Encryption Server Limited Powered by PGP Technology

clip_image001

2. 注意事項

(1) 購買Symantec Drive EncryptionFlexChoice with Encryption Server Limited Powered by PGP Technology

可以選擇安裝使用 Symantec Endpoint Encryption Full Disk (SEE Full Disk) 或是 Symantec Drive Encryption  with Encryption Manamement Server Limited

(2) 購買Symantec Drive and Removable Storage EncryptionFlexChoice with Encryption Server Limited Powered by PGP Technology

可以選擇安裝使用 Symantec Endpoint Encryption Full Disk (SEE Full Disk) 或是 Symantec Drive Encryption  with Encryption Manamement Server Limited

並且可使用 SEE Removable Storage Edition

clip_image002

SSIM 停產

  • SSIM 在2013年9月2日停止對新客戶的銷售
  • SSIM 4.8.1將是最終版本
  • 停止對新客戶的銷售 (EOS) 的 30 個月後,SSIM有限的產品的支持將包括:Hotfix,Patch,security fixes 和 maintenance packs for bug fixes
  • 技術支持將提供至2017年11月

請注意,賽門鐵克™安全信息管理器(SSIM)正在停止對新客戶的銷售為2013年9月2日的。

賽門鐵克正大力投資於我們的信息安全服務策略,專注於為客戶提供服務,包括安全戰略諮詢,安全監控和管理,事件響應和攻擊模擬的業界領先的產品組合。

同時評估SSIM是否有新策略的地方,我們得出的結論賽門鐵克的份額SIEM市場一直在下降,這將需要顯著的投資來獲得標準桿,超越了目前市場上的領導者。此外,由於國際空間站策略的關鍵宗旨是為客戶提供基於雲的安全解決方案,該決定是停止投資SSIM和雙降對我們的下一代安全解決方案。

雖然我們宣布銷售(EOS)的這一端,賽門鐵克致力於支持現有SSIM的客戶,直到2017年11月,使他們可以有足夠的時間來選擇和過渡到一個新的解決方案。

許可:
•現有客戶可能會購買額外的許可證來支持增量擴展為24個月以下的EOS。我們希望更多的時間,使客戶能夠執行一個優美遷移到一個替代解決方案。
•SSIM 4.8.1將是最終版本。現有SSIM客戶提供當前支持合同可以通過支持年底升級到最新版本。

技術支持:
•支持將提供至2017年11月,並沒有改變正在向支持的SLA。
•30個月後的EOS,SSIM有限的產品的支持將包括熱修復,補丁,安全修復和維護包的bug修復。
•一旦有限的支持結束後,局部(手機)的支持將被提供,直到2017年11月。

集電極更新和設備支持:
•賽門鐵克將提供現存唯一的收藏家bug修復。沒有新的收藏家將被添加超出了最近4.8.1版本中提供。

欲了解更多信息,請聯繫您的賽門鐵克客戶代表。


http://www.symantec.com/connect/forums/symantec-security-information-manager-ssim-being-discontinued-new-customer-sales-september-5-


Please be advised that Symantec™ Security Information Manager (SSIM) is being discontinued for new customer sales as of September 2, 2013.

Symantec is investing heavily in our Information Security Services strategy, which is focused on providing customers with an industry-leading portfolio of services including security strategy consulting, security monitoring and management, incident response and attack simulations.

While assessing whether SSIM had a place in the new strategy, we concluded Symantec’s share of the SIEM market has been declining and it would require significant investment to gain par and surpass the current market leaders.   Also, given that a key tenet of the ISS strategy is providing customers with cloud-based security solutions, the decision was made to discontinue investing in SSIM and double down on our next generation security solutions.

Although we are announcing this end of sale (EOS), Symantec is committed to supporting existing SSIM customers until November 2017 so they may have sufficient time to select and transition to a new solution.

Licensing:
•Existing customers may buy additional licenses to support incremental expansion for 24 months following EOS. Our hope is the additional time will enable customers to execute a graceful migration to an alternative solution.
•SSIM 4.8.1 will be the final release.  Existing SSIM customers with a current support contract may upgrade to the latest version through end of support.

Support:
•Support will be offered until November 2017 and no changes are being made to the support SLA.
•For 30 months after EOS, SSIM limited product support will include hot fixes, patches, security fixes and maintenance packs for bug fixes.
•Once limited support ends, partial (phone) support will be offered until November 2017.

Collector Updates and Device Support:
•Symantec will provide bug fixes on existing collectors only.  No new collectors will be added beyond those provided in the recent 4.8.1 release.

For more information, please contact your Symantec Account Representative.
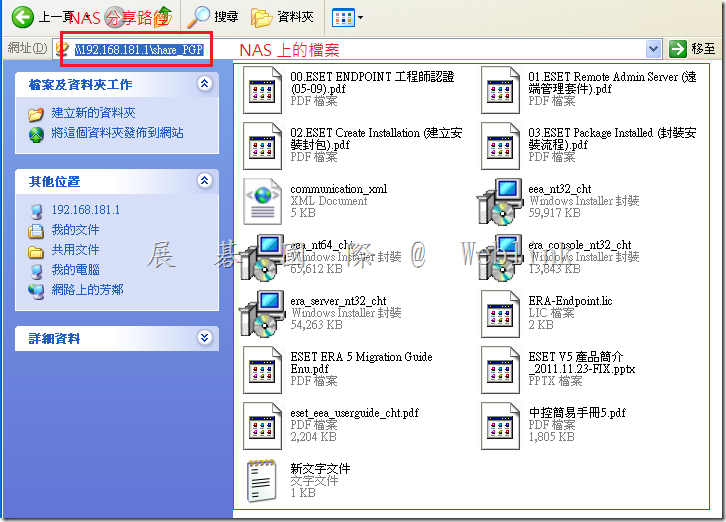
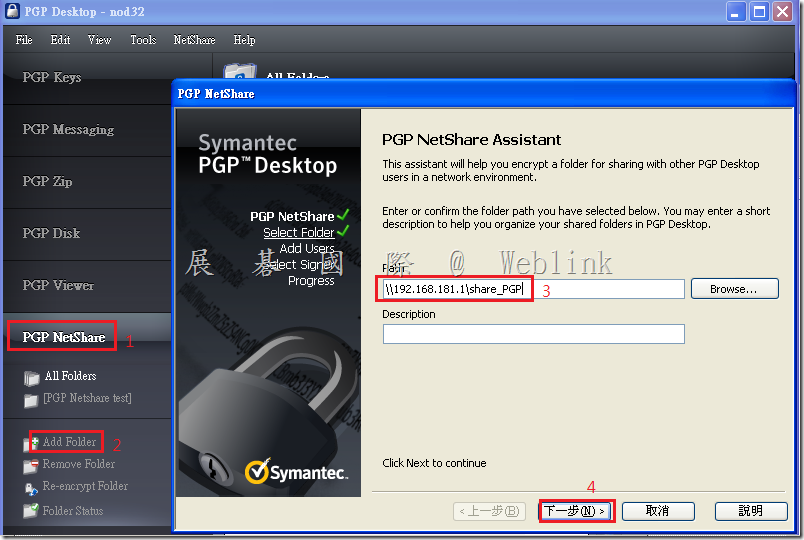
PGP Netshare ( Symantec File Share Encryption ) 可否加密 NAS 的分享資料夾?

PGP Netshare ( Symantec File Share Encryption ) 可否加密 NAS 的分享資料夾?

可以加密 NAS 的分享資料夾,步驟如下:

clip_image001

clip_image002

clip_image003

clip_image004

clip_image005

clip_image006

clip_image007

clip_image008

在沒有安裝 PGP Desktop 程式的電腦上,嘗試開啟 PDF 檔時,會出現【檔案類型不受支援,或者檔案已損壞】的訊息,而無法開啟檔案

clip_image009

在沒有安裝 PGP Desktop 程式的電腦上,嘗試開啟 TXT 檔時,檔案雖可成功開啟,但顯示為亂碼

clip_image010

也無法開啟 Powerpoint 檔

clip_image011

也無法開啟 MSI 檔

clip_image012

在沒有安裝 PGP Desktop 程式的電腦上,嘗試拖曳檔案至此 NAS 分享資料夾,檔案不會自動加密

在有安裝 PGP Desktop 程式的電腦上,嘗試拖曳檔案至此 NAS 分享資料夾,檔案會自動加密

clip_image013

如果使用了 PGP 硬碟加密,倘若電腦無法開機,或是硬碟有壞軌,資料該如何救回?(使用 bootg.iso 開機來解密硬碟)或(使用安裝PGP Desktop程式來解密)


如果使用了 PGP 硬碟加密,倘若電腦無法開機,或是硬碟有壞軌,資料該如何救回?

可以使用 bootg.iso 開機來解密硬碟,步驟如下:

開機後請按任意鍵來執行 PGP Recovery Disk

clip_image001

輸入密碼

clip_image002

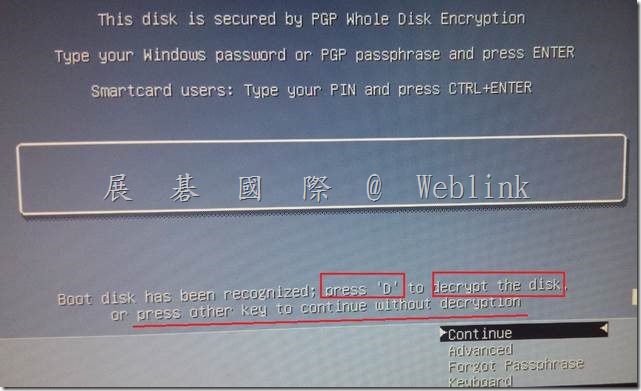
密碼確認OK,請按 D 來解密硬碟,或按其他鍵來進入系統

clip_image004

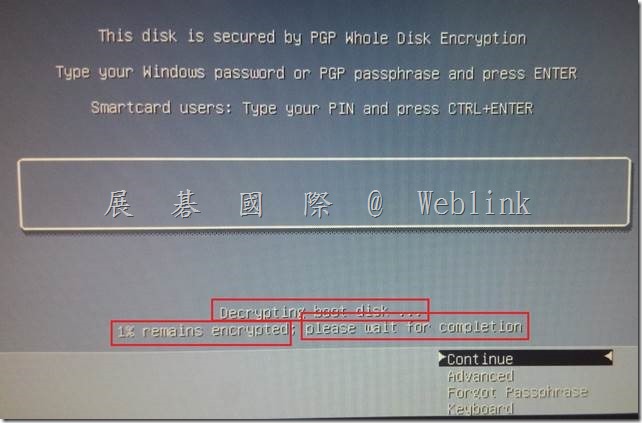
解密作業進行中

clip_image006

方法二:

1# 還能把這顆硬碟外接到另一台有加密過的電腦去掛載

>> 只要接到一台有安裝PGP Desktop電腦就可以讀取,會跳出如下畫面輸入密碼,若輸入完成後就可以正常讀取裡面資料

image

2# cmd去指定解密的帳號密碼

>> 指令方式如下:

PGPwde.exe –decrypt –disk 號碼 –passphrase 密碼

操作截圖:

image