[SEP] 安裝 SEP 後用戶端無法執行 VirtualBox

問題

When trying to start a Virtual Machine (VM) in VirtualBox with Symantec Endpoint Protection (SEP) Application and Device Control installed, the VM will not start and eventually times out. Additionally, when you try and restart the host machine, it hangs on shutting down.

錯誤訊息

VirtualBox pops up a window saying Starting VM: Creating process for virtual machine “VMname" (GUI/Qt)…(1/2) and will either hang on this window or may eventually throw a time out error after approximately 10 minutes.

原因

Oracle has been hardening the security on the application VirtualBox. SEP Application and Device Control injects it’s DLL into all running processes which in turn conflicts with the hardened security in VirtualBox. Oracle is working to address the compatibility issues with many AV products caused by the hardening of VirtualBox.

解決方案

創建一個應用程式控制資料夾排除在賽門鐵克端點保護經理 (SEPM) 目錄,和它是 VirtualBox 安裝到的位置的子資料夾。預設情況下這是: C:\Program Files\Oracle\VirtualBox\。
這將導致應用程式和設備控制不注入從該目錄中運行的應用程式或子目錄。

創建排除步驟:

1) 在 SEPM 去分配給受影響的用戶端是在組排除政策並打開要編輯它的策略

2) 編輯例外政策

3) 按一下新增-> Windows 例外-> 資料夾

4) 指定排除此資料夾的掃描類型選定 “應用程式控制的類型"

5) 設定 VirtualBox 的路徑安裝路徑,預設情況下它是 C:\Program Files\Oracle\VirtualBox\,請依照實際安裝路徑修改

6) 勾選包括子資料夾

7) 點擊「確定」以保存例外和確定再次關閉政策

8) 更新用戶端上的政策,並驗證它有新的政策

9) 將用戶端重新開機。

10) 重新開機後,請驗證 VirtualBox 是否正常運行。


適用于

賽門鐵克的端點保護 12.1

Windows 7 主機 (可能影響到其他主機)

任何訪客作業系統

VirtualBox 4.3.14-4.3.18 (某些測試版本可能或不可能展現這一問題,因為這正在處理)


https://support.symantec.com/en_US/article.TECH225620.html

[DLP] 安裝與建置 02 安裝 Oracle Critical Patch Update

版本:12.5

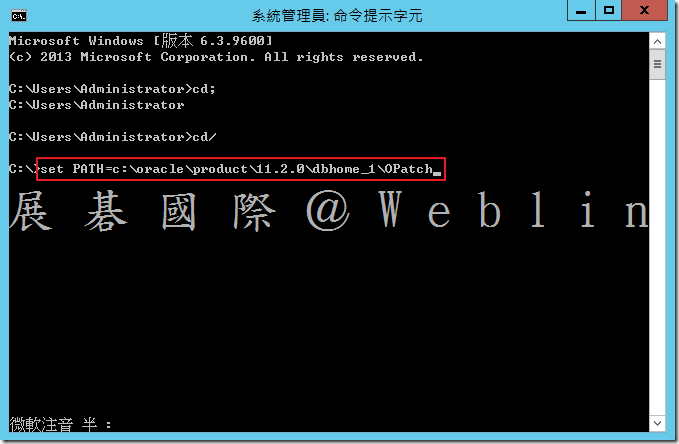
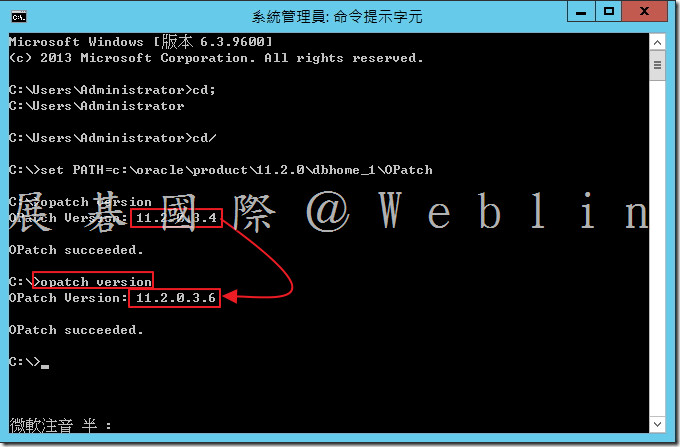
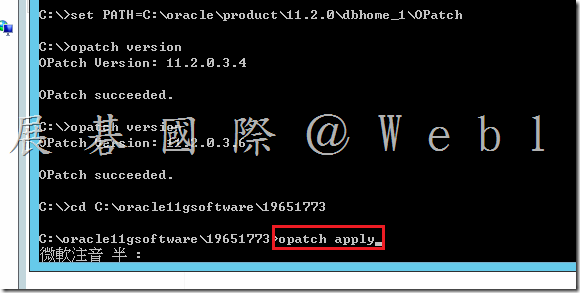
1.   set PATH=%PATH%;%ORACLE_HOME%\OPatch

image


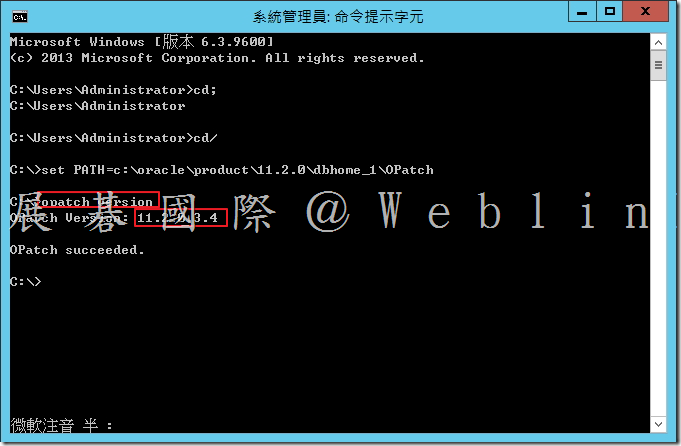
2.   opatch version

image


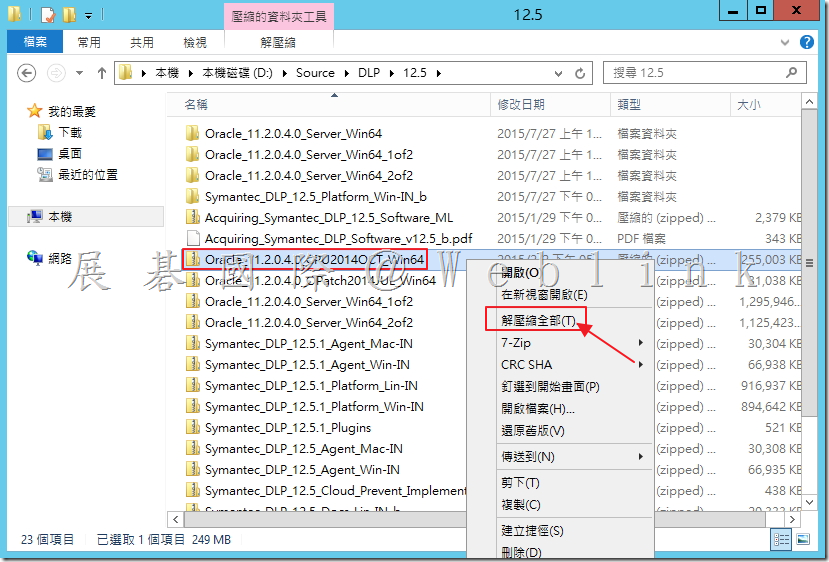
3.   解壓縮檔案「Oracle_11.2.0.4.0_CPU2014OCT_Win64」。

image


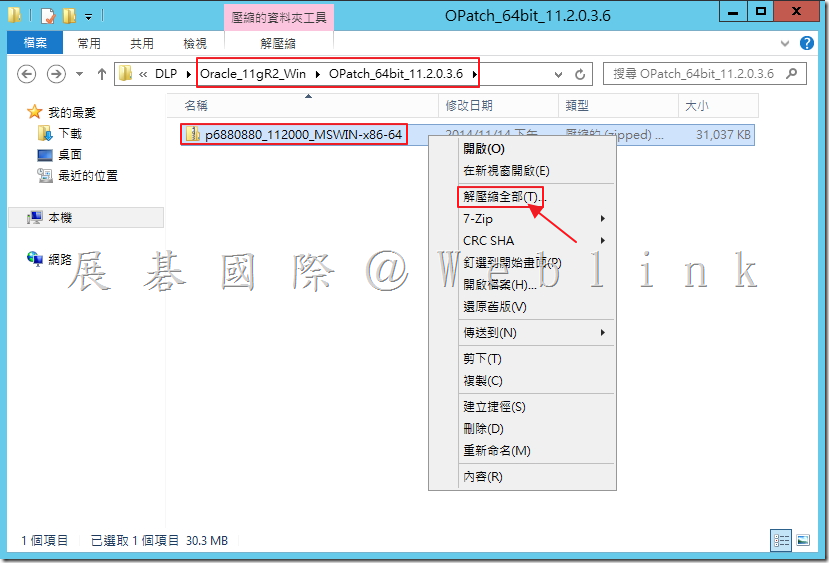
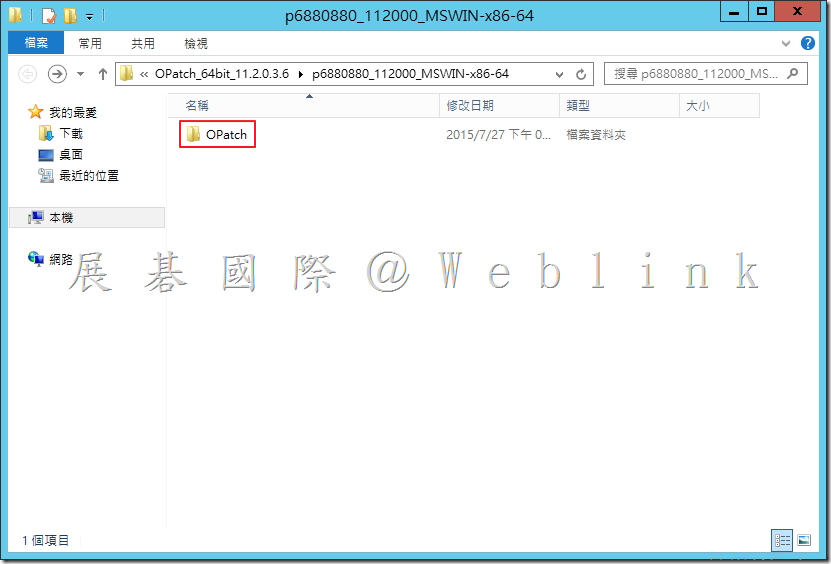
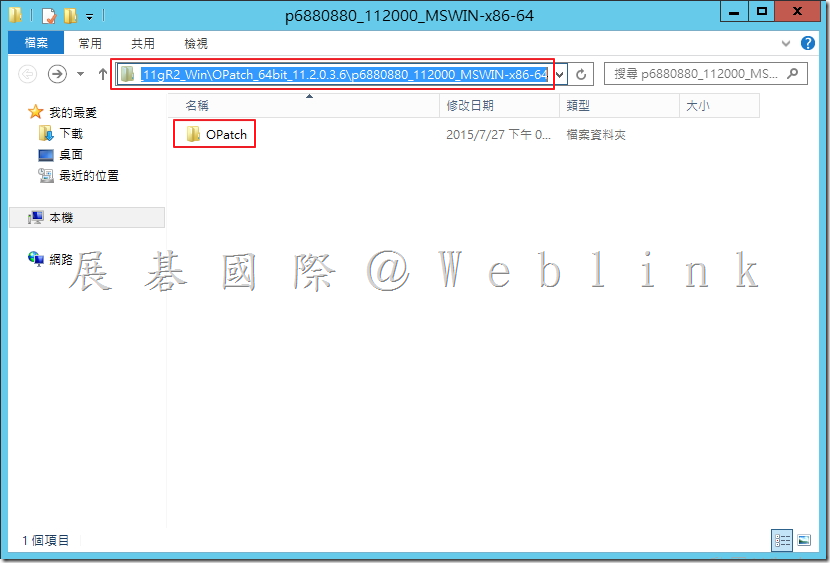
4.   於「\Oracle_11gR2_Win\OPath_64bit_11.2.0.3.6」解壓縮檔案「p6880880_112000_MSWIN-x86-64」。

image

image


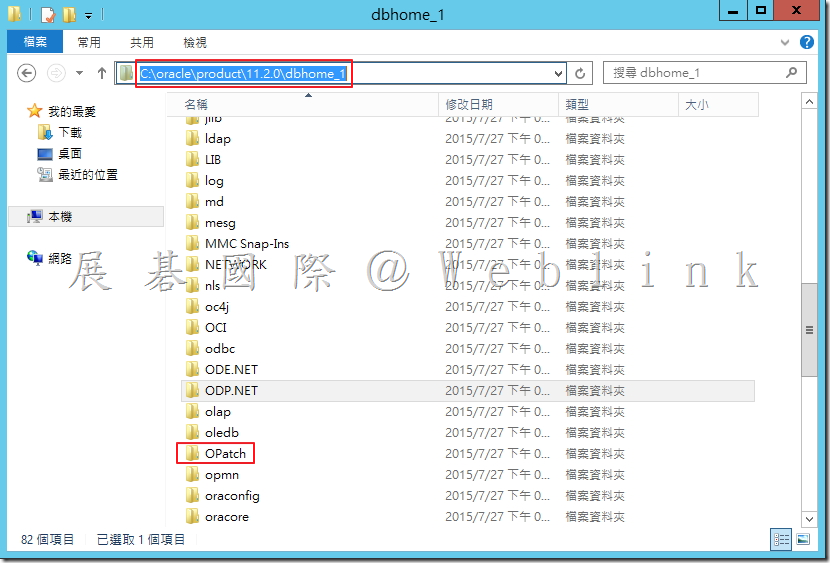
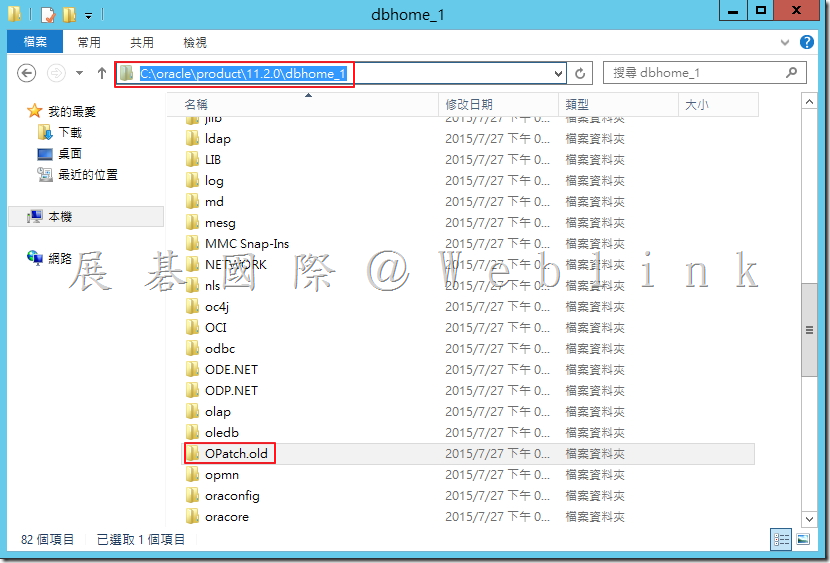
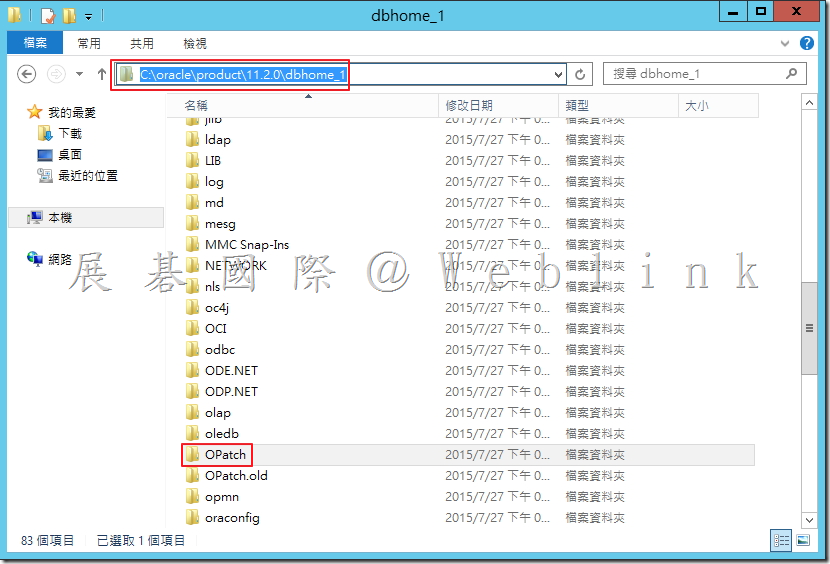
5.   將「C:\oracle\product\11.2.0\dbhome_1」內的資料夾「OPatch」修改名稱為「OPatch.old」。

image

image


6.   複製解壓縮後的「OPatch」至「C:\oracle\product\11.2.0\dbhome_1」內。

image

image


7.   opatch version,可看到版本從:11.2.0.3.4 變更為 11.2.0.3.6。

image


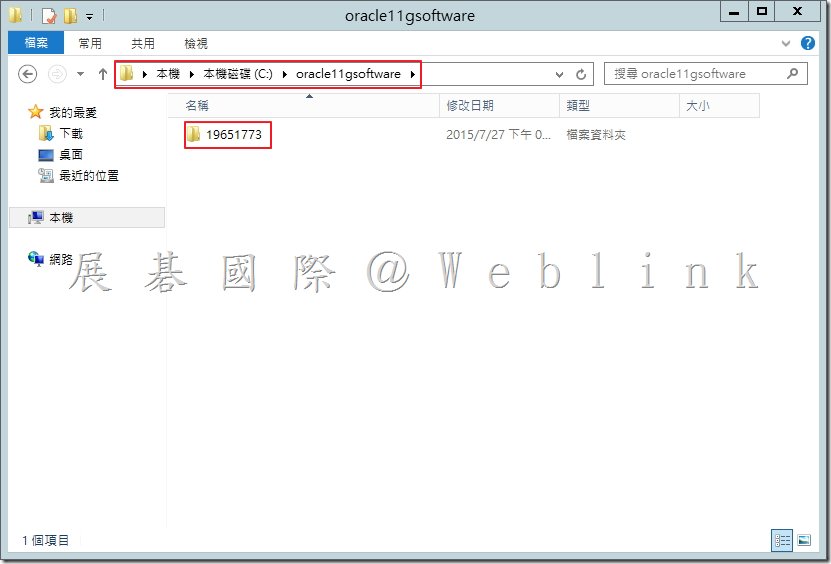
8.   新增資料夾「oracle11gsoftware」於「C:\」。

image


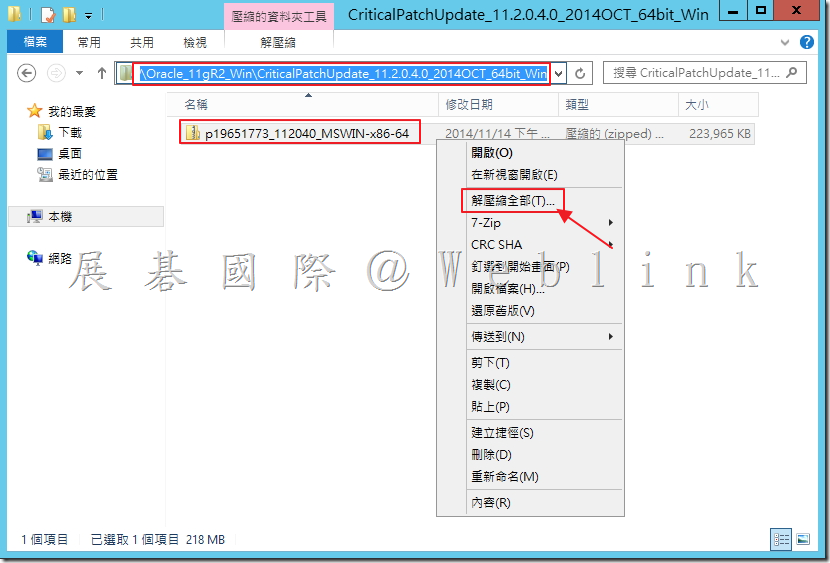
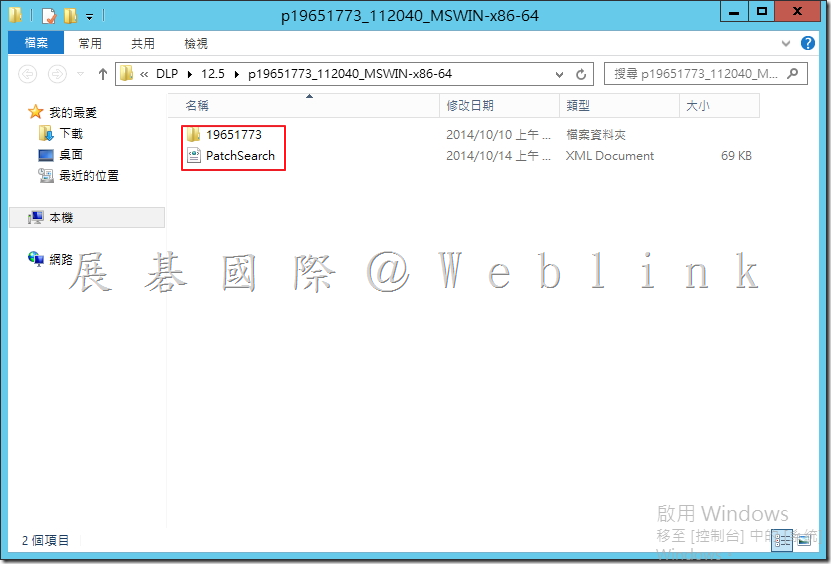
9.   於「\Oracle_11gR2_Win\CriticalPathUpdate_11.2.0.4.0_2014OCT_64bit_Win」解壓縮檔案「p19651773_112040_MSWIN-x86-64」。

image

image


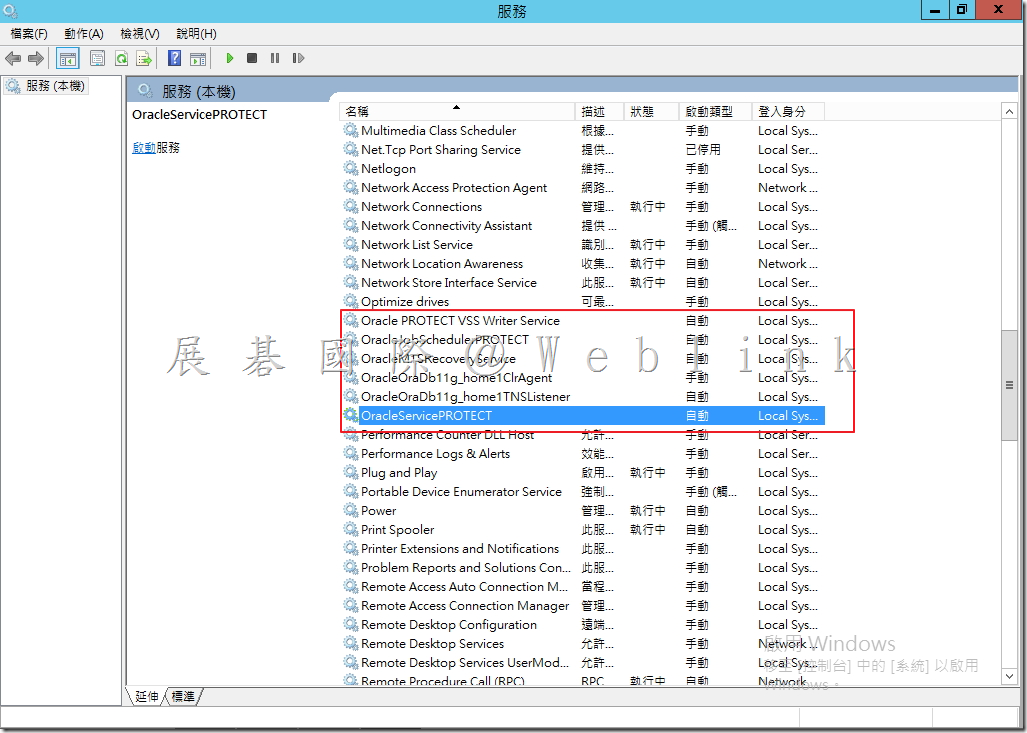
10.   停用所有 oracle 服務。

image


11.   複製步驟9【19651773】 至c:\oracle11gsoftware 資料夾。

image


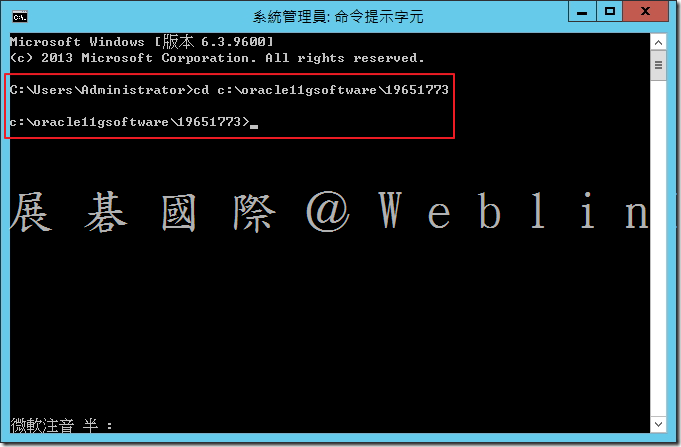
12.   開啟命令提示字元,執行「cd C:\oracle11gsoftware\19651773」。

image


13.   執行「opatch apply」。

image


※除錯方式

  • OPatch failed with error code = 74 oci.dll <<oci.dll 被MSDTC locker>>
  • 將 oracle home 目錄更名
  • 重新開機
  • 回復原目錄名
  • 停服務 → ok


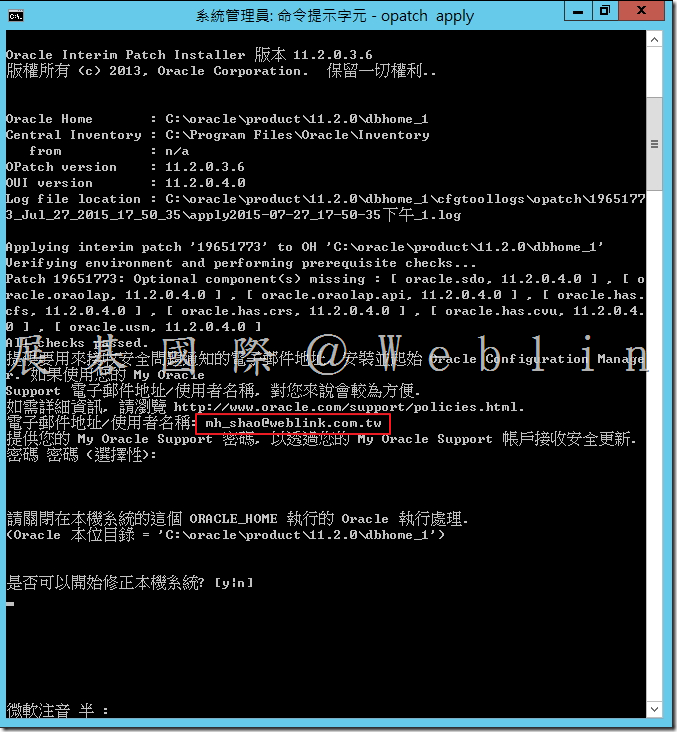
14.   輸入信箱。

image


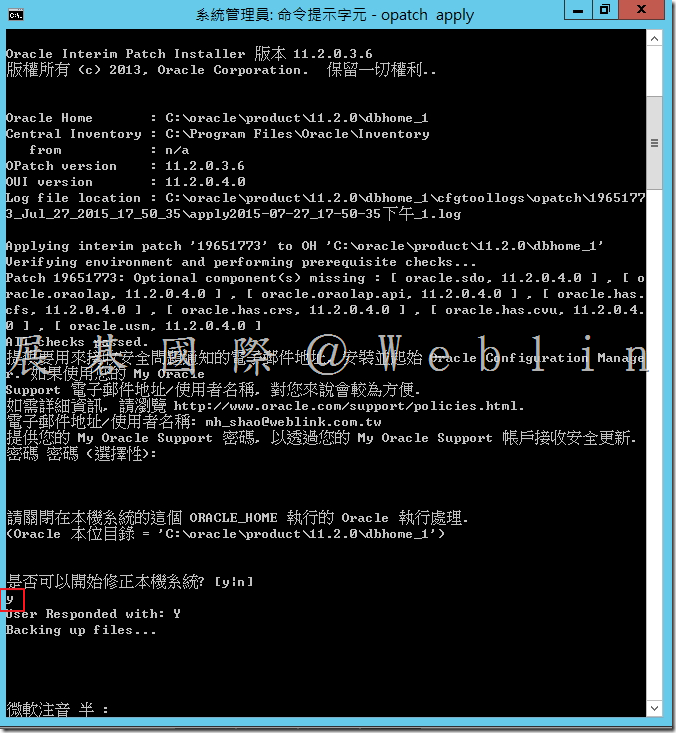
15.   是否可以開始修正本機系統?[ y: n],輸入「y」。

image


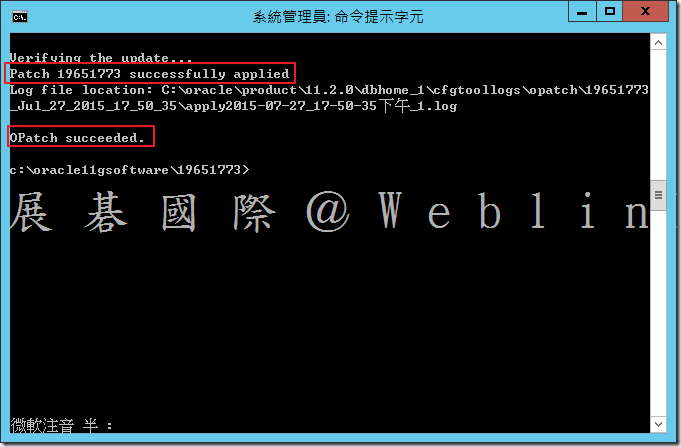
16.   更新 ORACLE Patch 成功。

image


17.   重開機後確認Oracle服務是否啟動(64 bit only 5)。

image

image

[DLP] 安裝與建置 01 安裝和建立 ORACLE 資料庫

版本:12.5


1.  在 Windows 服務中,如果正在執行以下服務,請將其停止:

  • 所有 Oracle 服務
  • Distributed Transaction Coordinator 服務

image

image


2.  準備安裝 Oracle 檔案。

2.1   解壓縮下載下來的【Oracle_11.2.0.4.0_Server_Win64_1of2.zip】與【Oracle_11.2.0.4.0_Server_Win64_2of2.zip】。

image

image


2.2   將 2.1 所解壓縮後的檔案「win64_11.2.0.4_database_1of2.zip」與「win64_11.2.0.4_database_2of2.zip」解壓縮後的檔案放至同個資料夾內。

image

image


2.3   解壓縮後可至剛剛選取的資料夾看到以下檔案。

image


3.   安裝 Oracle

3.1   執行「setup」。

image


3.2   檢查顯示器。

image


3.3   取消勾選「我希望透過My Oracle Support收到安全更新」,接著點選「下一步」。

image


3.4   點選「是」。

image


3.5   選取「略過軟體更新」,接著點選「下一步」。

image


3.6   點選「只安裝資料庫軟體」,接著點選「下一步」。

image


3.7   點選「單一執行處理資料庫安裝」,接著點選「下一步」。

image


3.8    確認語言「繁體中文」和「英文」,接著點選「下一步」。

image


3.9   選取「Standard Edition ( 3.7 GB )」,接著點選「下一步」。

image


3.10   修改安裝路徑。

C:\app\Administrator → C:\oracle

C:\app\Administrator\product\11.2.0\dbhome_1→C:\oracle\product\11.2.0\dbhome_1

image


3.11   安裝先決條件檢查。

image


3.12   確認安裝資訊無誤,點選「安裝」。

image


3.13   安裝中。

image


3.14   安裝完成,點選「關閉」。

image


4.   建立 Symantec Data Loss Prevention 資料庫

4.1   設定 ORACLE_HOME 環境變數

C:\oracle\product\11.2.0\dbhome_1

image


4.2 準備資料庫檔案。

4.2.1   解壓縮Symantec_DLP_12.5_Platform_Win-IN_b.zip。

image


4.2.2   開啟「New_Install」資料夾。

image


4.2.3   開啟「Oracle_Configuration」資料夾。

image


4.2.4   解壓縮「11.2.0.4_64_bit_Installation_Tools.zip」。

image


4.2.5   將 Oracle_11.2.0.4_Template_for_DLP_v12.5_64_bit_WIN.dbt 複製到「C:\oracle\product\11.2.0\dbhome_1\assistants\dbca\templates」

image


image


4.3   啟動 Oracle 資料庫組態輔助程式以建立 Symantec Data Loss Prevention 資料庫。

選擇「開始」>「所有程式」> Oracle – OraDb11g_home1 >「組態設定和移轉工具」>「資料庫組態輔助程式」

clip_image002

Windows server 2012 R2

clip_image004


4.4.  點選「下一步」。

image


4.5   點選「建立資料庫」,接著點選「下一步」。

image


4.6   選取「Oracle 11.2.0.4 Template for DLP v12.5 64 bit WIN」,接著點選「下一步」。

image


4.7   輸入並記錄資料庫名稱和SID,稍後在安裝Symantec Data Loss Prevention軟體時會用到這些資訊,接著點選「下一步」。

image


4.8   於「Enterprise Manager」取消選取「設定 Enterprise Manager」。

image


4.9   於「自動維護作業」取消選取「啟用自動維護作業」。

image


4.10   選取「所有帳戶使用相同管理員密碼」,在「密碼」欄位中輸入密碼(Passw0rd)在「確認密碼」欄位中重新輸入相同密碼,接著點選「下一步」。

image

image

請遵循以下規範來建立可接受的密碼:

  • 密碼不得包含引號。
  • 密碼不區分大小寫。
  • 密碼必須以字母字元開頭。
  • 密碼只能包含英數字元。請勿在密碼中使用底線(_)、美元符號($) 及井字符號(#),因為Oracle 解釋這些符號的方式不同於其他系統。
  • 密碼不得為 Oracle 保留字,例如 SELECT。
  • 如果您輸入的密碼不符合上述規範,Oracle 會繼續提示您提供密碼。您必須輸入密碼。請勿刪除Oracle 資料庫組態輔助程式。

4.11   點選「完成」。

image


4.12   設定完成,點選「確定」。

image


4.13   資料庫建立中。

image


4.14   資料庫建立完成,接著點選「密碼管理」。

image


4.15   可看到目前設定的帳戶及密碼,接著點選「確定」。

image


4.16   最後點選「結束」。

image


※除錯方式

如果資料庫建立程序失敗或當機,請檢查 Oracle 資料庫組態助理日誌 (位於 %ORACLE_HOME%\cfgtoollogs\dbca\SID 資料夾) 中的錯誤

(例如 C:\app\Administrator\product\11.2.0\dbhome_1\cfgtoollogs\dbca\protect)

clip_image002[1]

Windows server 2012 R2

clip_image003


5.   在 Windows 上建立 TNS 監聽程式

如果以網域使用者身分登入,則必須將 sqlnet.ora 檔案中的

SQLNET.AUTHENTICATION_SERVICES=() 值設定為 none。否則,請移至步驟2。

若要設定 sqlnet.ora 檔案的 SQLNET.AUTHENTICATION_SERVICES=() 值,請依序執行以下步驟:

  • 使用文字編輯器,開啟位於 %Oracle_Home%networkadmin 資料夾(例如 C:\oracle\product\11.2.0\dbhome_1\NETWORK\ADMIN)的 sqlnet.ora。
  • 將 SQLNET.AUTHENTICATION_SERVICES=(NTS) 值變更為 none。 SQLNET.AUTHENTICATION_SERVICES=(none)
  • 儲存並關閉 sqlnet.ora 檔案

5.1   執行網路組態輔助程式。

image

Windows server 2012 R2

clip_image004[1]


5.2   選取「監聽器組態」,接著點選「下一步」。

image


5.3   選取「新增」,接著點選「下一步」。

image

5.4   使用預測「監視器名稱:LISTENER」,接著點選「下一步」。

image


5.5   選取協定「TCP」,接著點選「下一步」。

image


5.6   選取「使用 1521 標準連接埠號碼」,接著點選「下一步」。

image


5.7   選取「否」,接著點選「下一步」。

image


5.8   監聽器組態完成,接著點選「下一步」。

image


6.   為 Symantec Data Loss Prevention 資料庫架構本機網路服務名稱

6.1   點選「區域網路服務名稱組態」,接著點選「下一步」。

image


6.2   點選「新增」,接著點選「下一步」。

image


6.3   輸入 Oracle 服務名稱,接著點選「下一步」。

image


6.4   選取「TCP」,接著點選「下一步」。

image


6.5   輸入「主機名稱」,接著點選「使用1521標準連接埠號碼」,最後點選「下一步」。

image


6.6   由於尚未啟動監聽程式,因此點選「否,不執行測試」,接著點選「下一步」。

image


6.7   輸入「網路服務名稱」,接著點選「下一步」。

image


6.8   點選「否」,接著點選「下一步」。

image


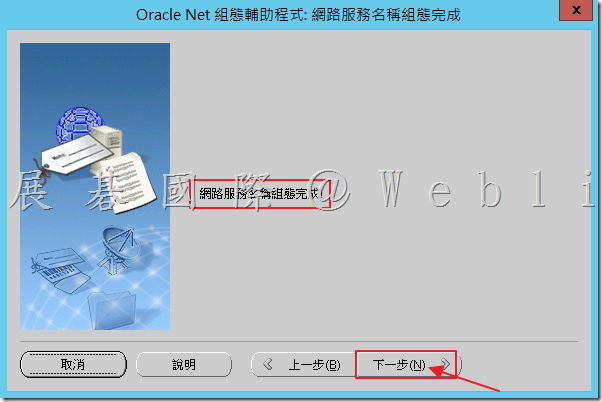
6.9   網路服務組態完成,接著點選「下一步」。

image


6.10   按下「完成」結束「Oracle 網絡組態輔助程式」。

image


7.   驗證 Symantec Data Loss Prevention 資料庫。

  • 啟動 SQL*Plus → sqlplus /nolog

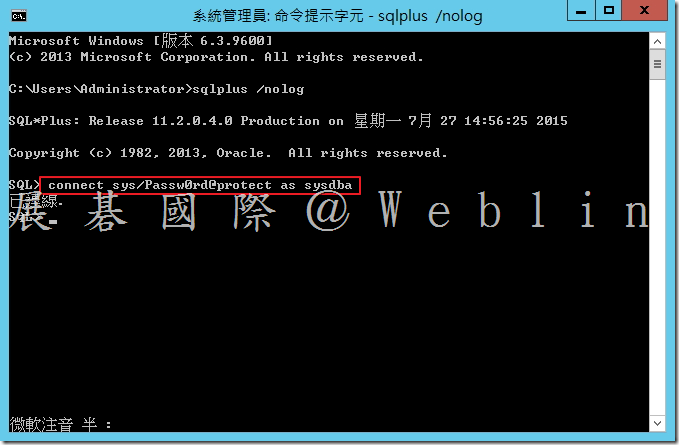
image


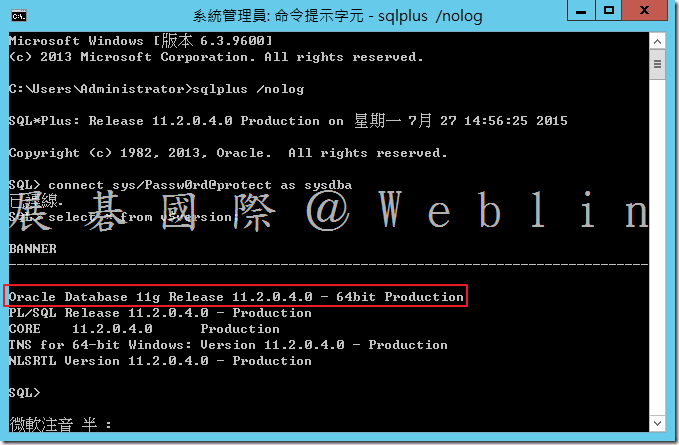
  • SYS 使用者身分登入 → SQL> connect sys/password@protect as sysdba
image


  • 執行以下查詢 → SQL> SELECT * FROM v$version;
image


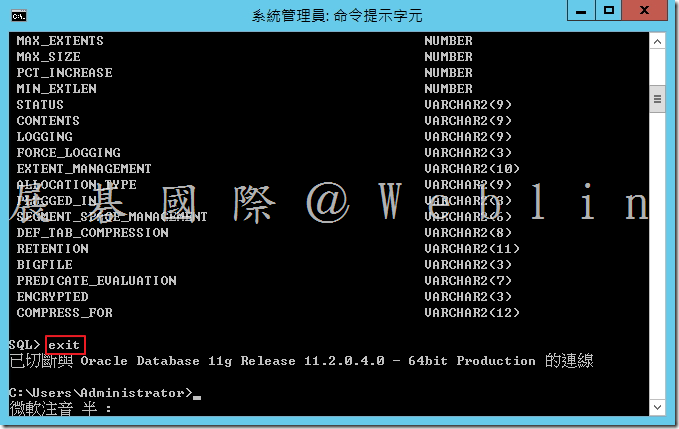
  • 執行以下指令,以描述 dba_tablespaces 檢視 → SQL> describe dba_tablespaces; 檢查輸出是否包含下列資訊﹕RETENTION VARCHAR2(11)、BIGFILE VARCHAR2(3)

image


  • 結束 SQL*Plus → SQL> exit

image


8.   為 Symantec Data Loss Prevention 建立 Oracle 使用者帳戶。

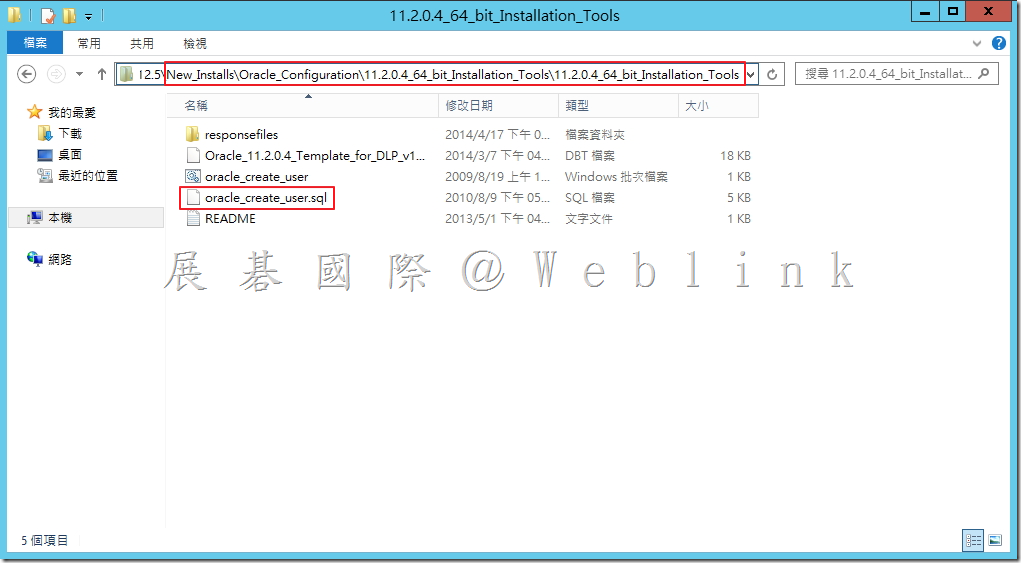
8.1   於「New_Install\Oracle_Configuration\11.2.0.4_64_bit_Installation_Tools

\11.2.0.4_64_bit_Installation_Tools中找到「Oracle_create_user.sql」複製至「c:\」。
image

image


8.2   開啟命令提示字元,切換至「c:\」→ cd\

image


8.3   啟動 SQL*Plus → sqlplus /nolog

image


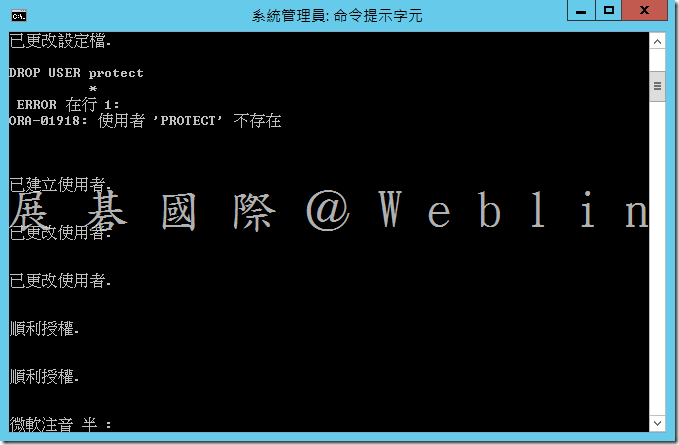
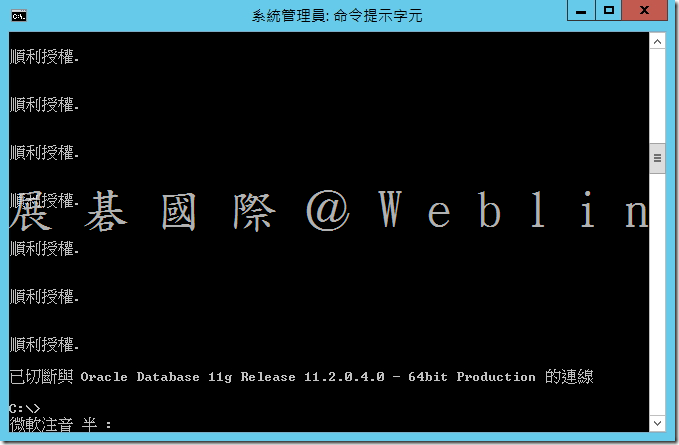
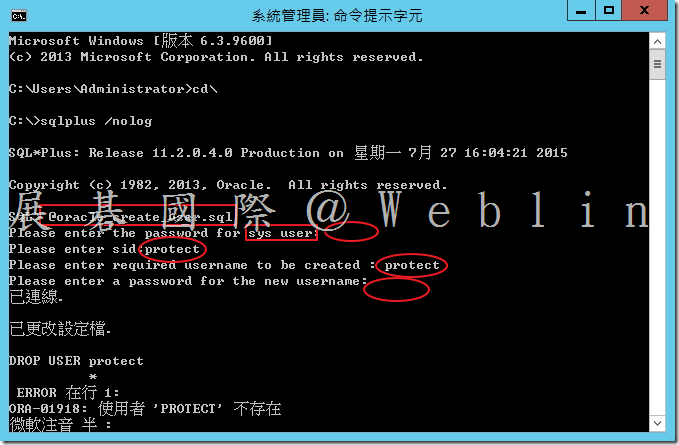
8.4   執行 oracle_create_user.sh 程序檔 → SQL> @oracle_create_user.sql
image

image

image


9.   鎖定 DBSNMP Oracle 使用者帳戶

應鎖定 Oracle DBSNMP 使用者帳戶,以維護安全。

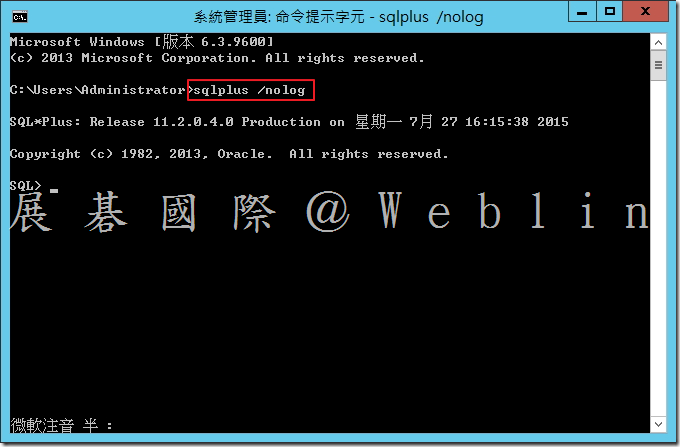
9.1   開啟指令提示字元,然後啟動 SQL*Plus → sqlplus /nolog
image


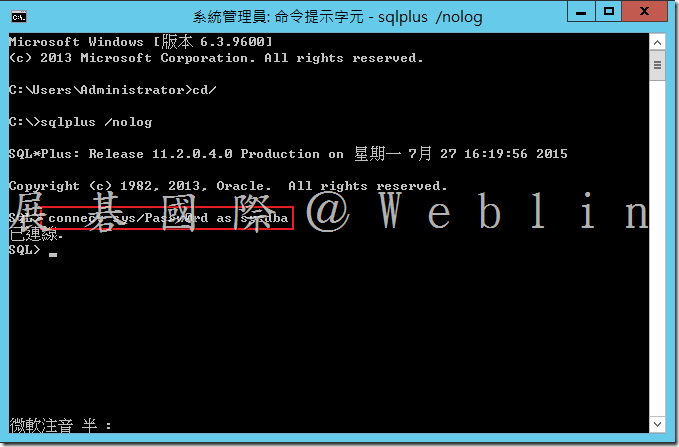
9.2    以SYS使用者身分登入 → SQL> connect sys/password as sysdba

其中 password 為 SYS 密碼。
image


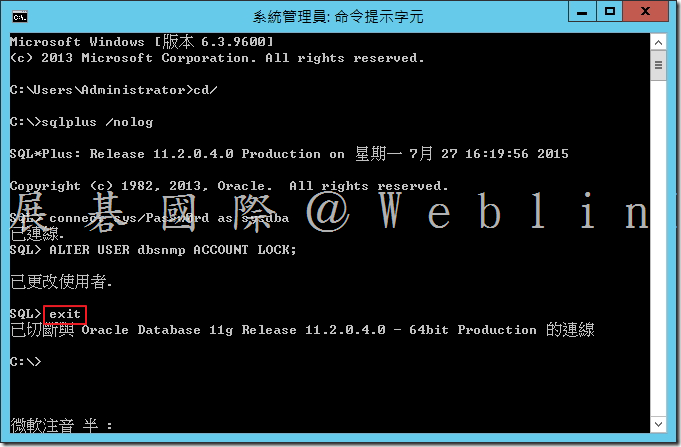
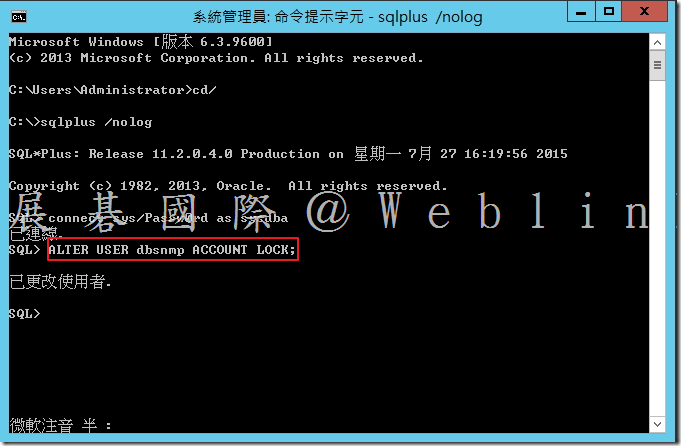
9.3   鎖住 DBSNMP 使用者帳戶 → SQL> ALTER USER dbsnmp ACCOUNT LOCK;
image


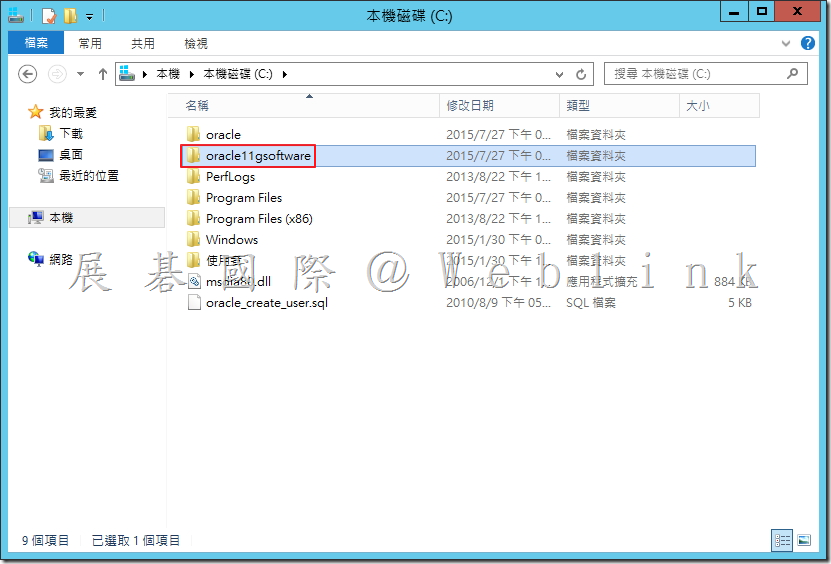
9.4   結束SQL*Plus → SQL> exit
image

Symantec DCS 如何搜尋 Event 以及匯出 Event

1. 選取「Monitors」頁籤,點選「Events」,接著點選「Search」。

image


2. 於左方設定頁面輸入欲搜尋的條件,如圖所示為搜尋「Event Category:Prevention」、「Event Status:Warning」,「In the last 500 events」條件輸入完畢後,請點選「Search」。(可依照需求調整搜尋條件)。

image


3. 搜尋中,依照不同條件以及資料庫的事件量,搜尋的時間將會有所影響。

image


4. 搜尋成功後,可從右上方區塊看到符合條件的 Evnets,下方區塊則可看到上方區塊所選取的 Event 細節。

image


5. 接著點選「Export」,則可將目前所搜尋到的 Events 匯出。

image


6. 選取存放路徑,接著確認檔名,最後點選「Export」。

(需注意右方選項 All pages,並非指目前搜尋條件的所有頁面,而是目前資料庫內的所有頁面)

image


7. 匯出後即可得到一份剛剛所設定之搜尋條件之 Events 的 csv 檔案。

image

[SEP] 如何手動移除 Client 安裝程式

問題:

  • 發現無法正常移除 SEP Client 程式

版本:

  • 11.0.X
  • 12.1.X

解決方案:

Symantec Endpoint Protection 12.1

Symantec Endpoint Protection Small Business Edition 12

Symantec Endpoint Protection 11

Other

參考:

https://support.symantec.com/en_US/article.TECH96924.html

About Symantec Endpoint Protection and the Poodle SSL 3.0 vulnerability (CVE-2014-3566)

Problem


A security bug affecting SSL 3.0 was released on October 14, 2014.


Solution


The management console for Symantec Endpoint Protection Manager (SEPM) prior to SEP 12.1.6 does use SSL 3.0. As a result, Symantec Endpoint Protection (SEP) is affected.


Impacted versions

  • 12.1.x Symantec Endpoint Protection Windows client
  • 12.1.5 and earlier Symantec Endpoint Protection Manager
  • 12.1 Symantec Network Access Control Windows client
  • 12.1.x Symantec Network Access Control Windows On-Demand client
  • 12.1.x Symantec Network Access Control Mac On-Demand client
  • 12.1.x Symantec Network Access Control Gateway Enforcer
  • 12.1.x Symantec Network Access Control LAN Enforcer
  • 12.1.x Symantec Network Access Control Integrated Enforcer
  • 12.1.x RU5 Security Virtual Appliance (SVA)
  • 12.1.x Symantec Endpoint Protection for Mac
  • 12.1.5 Symantec Endpoint Protection Linux client
  • 12.1.x Symantec Antivirus for Linux
  • LiveUpdate Administrator 2.3.3 and 2.3.4


Mitigation: Secure the communication between SEPM Java console and SEPM

Note: Due to the version of Java that shipped with SEP 12.1 RTM, 12.1 RU1 and 12.1 RU1 MP1, there are some limitations to the functionality should these steps be followed.

  1. In a text editor, open the following file:
    C:\Program Files\Symantec\Symantec Endpoint Protection Manager\apache\conf\ssl\ssl.conf
  2. Change the following line:
    SSLProtocol all -SSLv2
    to:
    SSLProtocol all -SSLv2 -SSLv3
    If the line does not exist, create it.
  3. Restart the Symantec Endpoint Protection Manager Webserver service.
  4. In a text editor, open the following file:
    C:\Program Files\Symantec\Symantec Endpoint Protection Manager\tomcat\conf\server.xml
  5. In the <Connector> section for port 8443, locate the following line:
    sslProtocol="TLS"
    Note: 8443 is the default port used for SEPM console / SEPM server communication. If you have changed the configuration, this port may be different.
  6. Do one of the following:
    • If you are using SEP 12.1 RTM, RU1, or RU1 MP1, add the following line after sslProtocol="TLS":
      Protocols="TLSv1,TLSv1.1,TLSv1.2″
    • If you are using a version of SEP later than RU1 MP1, add the following line after sslProtocol="TLS":
      sslEnabledProtocols="TLSv1,TLSv1.1,TLSv1.2″
  7. Restart the Symantec Endpoint Protection Manager service.
  8. If you use the Web console, ensure that the browser has TLS enabled.

Additional information for 12.1 RTM, RU1 and RU1 MP1

  • The web console will fail to connect. This is a known issue with that version of JRE. The only workaround is to update to a newer version of SEP.
  • The local Java console will fail to connect. To work around this problem:
    1. Install the latest JRE.
    2. Edit the file C:\Program Files\Symantec\Symantec Endpoint Protection Manager\bin\sesm.bat to replace the path of javaw.exe with the new JRE path.
  • The Remote Java console (including running locally) is not impacted.
  • If at any time you upgrade SEPM to a 12.1 version that is older than RU5, follow the steps in this document again.


Mitigation: Secure the communication between SEP client and SEPM

This section is only applicable if SSL has been enabled on SEPM for client communication.

Configure SEPM to accept only TLS connections


  1. In a text editor, open the following file:
    C:\Program Files\Symantec\Symantec Endpoint Protection Manager\apache\conf\httpd.conf
  2. Remove the “#” character at the beginning of the following line:
    #Include conf/ssl/sslForClients.conf
  3. In a text editor, open the following file:
    C:\Program Files\Symantec\Symantec Endpoint Protection Manager\apache\conf\ssl\sslForClients.conf
  4. Change the following line:
    SSLProtocol all -SSLv2
    to:
    SSLProtocol all -SSLv2 -SSLv3
  5. Restart the Symantec Endpoint Protection Manager Webserver service.

If at any time you upgrade SEPM to a 12.1 version that is older than RU5, follow the steps in this document again.


Enable TLS on communication between SEP client and SEPM

On Windows XP or 2003 clients that use Internet Explorer (IE) 6.x, enable TLS manually. All other operating systems have TLS enabled by default.

Note: This is an operating system change. Please consult Microsoft documentation should there be any questions. Also, ensure that any applicable testing is conducted to ensure no negative results with third party applications.

Enable all SSL versions and TLS1.0 for the local system account

  1. In the Windows registry, go to the following key:
    HKEY_USERS\S-1-5-18\Software\Microsoft\Windows\CurrentVersion\Internet Settings
  2. Change the DWORD value SecureProtocols to 0xa8.
  3. Restart the SEP service.


Mitigation: Secure the communication between Symantec Network Access Control Windows On-Demand Client and SEPM


The following changes should be made to enable TLS before using Symantec Network Access Control (SNAC) Windows On-Demand Client (WODC) on Windows XP or 2003 clients that use IE 6.x.

Note: This is an operating system change. Please consult Microsoft documentation should there be any questions. Also, ensure that any applicable testing is conducted to ensure no negative results with third party applications.

  1. On the client computer, log on to Windows as the user that will run WODC.
  2. In the Windows registry on the client computer, do one of the following:
    • If the user account that runs WODC is part of the local administrators group, go to HKEY_USERS\S-1-5-18\Software\Microsoft\Windows\CurrentVersion\Internet Settings, and set the SecureProtocols value to 0xa8.
    • If the user account that runs WODC is not part of the local administrators group, go toHKEY_CURRENT_USER\Software\Microsoft\Windows\CurrentVersion\Internet Settings, and set the SecureProtocols value to 0xa8.


Mitigation: Secure the communication between SEPM Remote Management Application (RMM) and SEP clients


If you do not use the RMM feature, you can disable the RMM port.

Note: Once SSL 3.0 is disabled for RMM web service ports, any client that uses this service will have to use TLS to connect. If the client does not support TLS, the connection to RMM web service will fail.

  1. In a text editor, open the following file:
    C:\Program Files\Symantec\Symantec Endpoint Protection Manager\tomcat\conf\server.xml
  2. In the <Connector> section for port 8446, after the line sslProtocol="TLS", add the following line:
    sslEnabledProtocols="TLSv1,TLSv1.1,TLSv1.2″
    Note: 8446 is the default port used for SEPM RMM communication. If you have configured the port, this value might be different Check your configuration settings to see the actual value.
  3. Restart the Symantec Endpoint Protection Manager service.

If at any time you upgrade SEPM to a 12.1 version that is older than RU5, follow the steps in this document again.


Mitigation: Disable web services for Symantec Protection Center (SPC)


Disable web services for SPC. SEPM port 8444 is used for SPC communication. This port has hard-coded support for SSLv3.

Disabling web services may impact the function of SPC.


Mitigation: Secure LiveUpdate Administrator communications


If LiveUpdate Administrator is installed, disable SSL communications.

Disable SSL

  1. In the LiveUpdate Administrator installation folder, go to \tomcat\conf\.
  2. Open server.xml in a text editor.
  3. Find the line that begins with:
    <Connector port="7073″ maxHttpHeaderSize="8192″ clientAuth="false" SSLEnabled="true" keystoreFile="../jre/bin/server-cert.ssl" …
  4. Change
    sslProtocol="TLS"
    to
    sslEnabledProtocols = “TLSv1,TLSv1.1,TLSv1.2″
  5. Save and close server.xml.
  6. Restart the Tomcat services.


Poodle variant CVE 2014-8730


Symantec Endpoint Protection is not affected by the Poodle variant CVE 2014-8730.


References


https://support.symantec.com/en_US/article.TECH225689.html

About Data Center Security: Server (Advanced) and the Poodle SSL 3.0 vulnerability (CVE-2014-3566)

Problem


A security bug affecting SSL 3.0 was released on October 14, 2014.


Solution


The DCS 6.0.x and CSP 5.2.9 Manager utilize a version of SSL 3.0 that is susceptible to POODLE. Customers should add the entry sslEnabledProtocols="TLSv1,TLSv1.1,TLSv1.2″ to <server install>\tomcat\conf\server.xml. All future release will contain this change by default.

Recommend steps:

  1. Stop CSP/DCS manager service
  2. Take backup of Server.xml file
  3. Edit the server.xml file to make the suggested changes using xml editors to ensure that double quotes (“) with appropriate encoding will be used.
  4. Start CSP/DCS manager service


CSP Server 5.2.9 MP1 – MP5 (having Tomcat 7.x)

DCS:SA Server 6.0, 6.0 MP1 (having Tomcat 7.x)

The entry sslEnabledProtocols="TLSv1,TLSv1.1,TLSv1.2″ needs to be added to the three SSL Connector configured in server.xml.


These SSL Connectors are for the:

  • Tomcat Stand-Alone Agent Service
  • Tomcat Stand-Alone Console Service
  • Tomcat Stand-Alone Service


The following example shows this change:

<Connector port="%AGENT_PORT% / %CONSOLE_PORT% / %ADMIN_PORT%"

maxThreads="200″ minSpareThreads="50″ enableLookups="false" disableUploadTimeout="true" maxKeepAliveRequests="1″

acceptCount="25″ scheme="https" secure="true" SSLEnabled="true"

keystorePass="<KeyStorePassword>"

keystoreFile="<KeyStoreFilePath>"

clientAuth="false" sslProtocol="TLS" sslEnabledProtocols="TLSv1,TLSv1.1,TLSv1.2″

ciphers="%comma_separated_list_of_ciphers%"/>


<Connector port="%AGENT_PORT% / %CONSOLE_PORT% / %ADMIN_PORT%"

maxThreads="40″ minSpareThreads="10″ enableLookups="false"

disableUploadTimeout="true" maxKeepAliveRequests="1″

acceptCount="10″ scheme="https" secure="true" SSLEnabled="true"

keystorePass="<KeyStorePassword>"

keystoreFile="<KeyStoreFilePath>"

clientAuth="false" sslProtocol="TLS" sslEnabledProtocols="TLSv1,TLSv1.1,TLSv1.2″

ciphers="%comma_separated_list_of_ciphers%"/>


CSP Server 5.2.8 – 5.2.8 MP4 and 5.2.9 (having tomcat 5.x):

The entry sslProtocols="TLSv1,TLSv1.1,TLSv1.2″ needs to be added to the following SSL Connector configured in server.xml.

  • Tomcat Stand-Alone Service


The entry sslProtocols="SSLv2Hello,TLSv1,TLSv1.1,TLSv1.2″ needs to be added to the following SSL Connector configured in server.xml.

  • Tomcat Stand-Alone Console Service
  • Tomcat Stand-Alone Agent Service


The following example shows this change:

<Connector port="%AGENT_PORT% / %CONSOLE_PORT% / %ADMIN_PORT%"

maxThreads="200″ minSpareThreads="50″ maxSpareThreads="100″

enableLookups="false" disableUploadTimeout="true" maxKeepAliveRequests="1″

acceptCount="25″ debug="0″ scheme="https" secure="true"

keystorePass="<KeyStorePassword>"

keystoreFile="<KeyStoreFilePath>"

clientAuth="false" sslProtocol="TLS" sslProtocols="SSLv2Hello,TLSv1,TLSv1.1,TLSv1.2″

ciphers="%comma_separated_list_of_ciphers%"/>


<Connector port="%AGENT_PORT% / %CONSOLE_PORT% / %ADMIN_PORT%"

maxThreads="40″ minSpareThreads="10″ maxSpareThreads="25″

enableLookups="false" disableUploadTimeout="true" maxKeepAliveRequests="1″

acceptCount="10″ debug="0″ scheme="https" secure="true"

keystorePass="<KeyStorePassword>"

keystoreFile="<KeyStoreFilePath>"

clientAuth="false" sslProtocol="TLS" sslProtocols="SSLv2Hello,TLSv1,TLSv1.1,TLSv1.2″

ciphers="%comma_separated_list_of_ciphers%"/>


<Connector port="%AGENT_PORT% / %CONSOLE_PORT% / %ADMIN_PORT%"

maxThreads="55″ minSpareThreads="5″ maxSpareThreads="8″

enableLookups="false" acceptCount="10″ maxKeepAliveRequests="1″ debug="0″

connectionTimeout="20000″ scheme="https" disableUploadTimeout="true" secure="true"

keystorePass="<KeyStorePassword>"

keystoreFile="<KeyStoreFilePath>"

clientAuth="false" sslProtocol="TLS" sslProtocols="TLSv1,TLSv1.1,TLSv1.2″

ciphers="%comma_separated_list_of_ciphers%"/>

This issue has been addressed in SCSP 5.2.9 MP6

Symantec Critical System Protection 5.2 RU9 MP6 uses only the TLSv1x protocol to communicate among the server, agent, and console.


References


https://support.symantec.com/en_US/article.TECH225827.html

Symantec DLP and POODLE SSL 3.0 protocol weakness (CVE-2014-3566)

Problem


Symantec Data Loss Prevention uses the SSL/TLS protocol to secure netwok communications. SSL/TLS channels are used between the client browser and the Enforce Server, the Enforce Server and detection servers, as well as between the Endpoint Server and DLP Agents. The SSL/TLS channel between the client browser and the Enforce Server administration console may use SSL 3.0.

SSL 3.0 uses nondeterministic CBC padding in certain ciphers, which makes it easier for man-in-the-middle attackers to obtain clear-text data via a padding-oracle attack (dubbed POODLE – Padding Oracle On Downgraded Legacy Encryption).

Solution


SSL/TLS Channel

Protocol

Impact

Comments

Web browser <–> Enforce Server administration console SSL 3.0, TLS 1.0, TLS 1.1, TLS 1.2 Affected (not vulnerable)

Action required.

Depending on the Data Loss Prevention version, SSL 3.0 support can be disabled in the web browser, or by updating the tomcat configuration. Updating tomcat’s configuration is the recommended and long-term approach, as this will ensure SSL 3.0 is never negotiated with the browser.

Data Loss Prevention 11.6.x and 12.x
SSL 3.0 can be disabled either by updating the tomcat server configuration, or in the web browser.

To disable SSL 3.0 support via the tomcat server configuration files:

  1. In server.xml (typically inC:\SymantecDLP\Protect\tomcat\conf\ on Windows), addsslEnabledProtocols="TLSv1.2,TLSv1.1,TLSv1″ to the HTTPS Connector configuration (<Connector …).
  2. Restart the Vontu Manager service.

To disable SSL 3.0 support in the web browser, follow the steps outlined below for Data Loss Prevention version 11.5.x and earlier.

Data Loss Prevention 11.5.x and earlier

SSL 3.0 support must be disabled in the web browser.

In Firefox:

  1. Type about:config in the URL bar.
  2. Set security.tls.version.min to 1, andsecurity.tls.version.max to 3. Refer to this link for details.

In Internet Explorer:

  1. Go to Settings/Tools > Internet Options > Advanced tab.
  2. Uncheck “Use SSL 3.0″.
  3. Click Apply.
  4. Click Okay.
Enforce Server <–> detection servers TLS 1.0, TLS 1.1, TLS 1.2 Not Affected

No action required.

Enforce and Detection servers use TLS protocol by default for communication.

Endpoint Server <–> DLP Agents TLS 1.0, TLS 1.1, TLS 1.2 Not Affected

No action required.

Endpoint Server and DLP Agents use TLS by default for communication.


References

https://support.symantec.com/en_US/article.TECH225739.html

[SEP] 如何查詢 GUP 運作情形?

1. 點選「監視器」,接著選取「日誌」頁籤,於「日誌類型」選取『系統』、於「日誌內容」選取『用戶端活動』、於「時間範圍」選取『欲查詢的時間』,接著點選「進階設定」。

image

2. 於「事件類型」選取『用戶端事件』、於「事件來源」輸入『SYLINK』,接著點選「檢視日誌」。

image

3. 可看到相關資訊,接著點選「詳細資訊」。

image

4. 可看到透過哪台GUP更新以及為哪台機器。

image