Dwg word document signature (IDM)

Dwg word document signature (IDM)

說明:

已建立索引的文件比對 (IDM) 會比對來自敏感專屬文件的非結構化資料。支援的文件類型範例包含 Microsoft Word、PowerPoint、PDF、設計計劃、原始程式碼、CAD/CAM 圖像、財務報告、機密併購文件等。

IDM 可對擷取資料的離散區段進行註冊和指紋加密。它透過移除標點符號和格式來正規化文字。標準化程序可確保內容的呈現方式不會影響或中斷偵測。

IDM 使用統計取樣方法來儲存指紋鑑定文件的雜湊區段。並非所有文字都會儲存在文件設定檔中。此方法可提高 IDM 精確率,同時讓您能夠新增偵測伺服器來輕鬆調整政策。您也可以將內容列入白名單並將其排除在比對之外。

架構 IDM 政策時,您可訂定內容必須有某個百分比符合文件設定檔,才會觸發資安事端。如果在指紋中偵測到所有雜湊區段,則可使用 IDM 來偵測文字文件的精確內容比對。這樣就可以偵測衍生文件,如各次修訂版和各次版本。您也可以使用 IDM比對部分文件內容和文字段,例如複製到其他文件或郵件中的內容片段。

除全部和部分文件比對之外,您還可以使用 IDM 來偵測二進位內容。除了針對部分文件比對所建立的雜湊之外,再建立二進位內容的 MD5 雜湊,即可實作這項偵測。

您可以使用這種形式的 IDM 來偵測系統無法破解和擷取文字內容的檔案類型,如媒體檔案或專屬檔案格式。

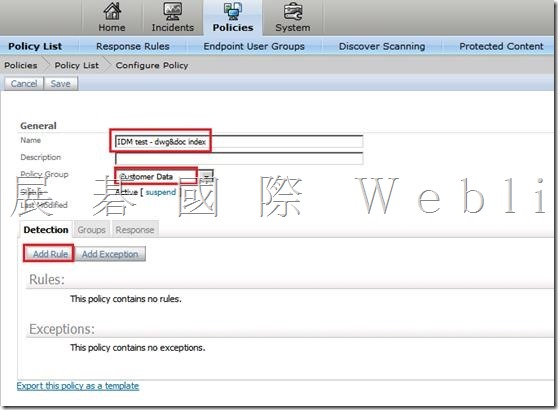
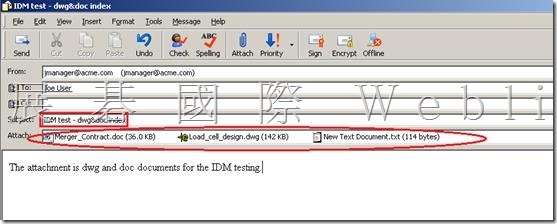
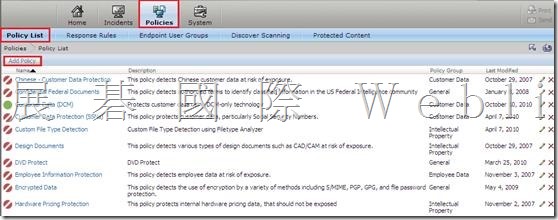
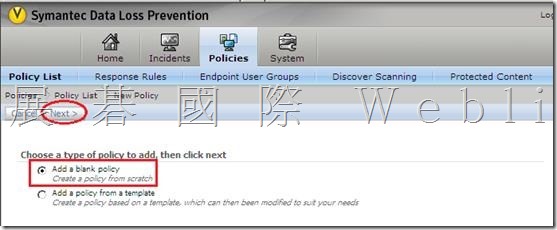
l 建立一個 IDM policy,並測試寄送附件時,DLP 偵測狀況

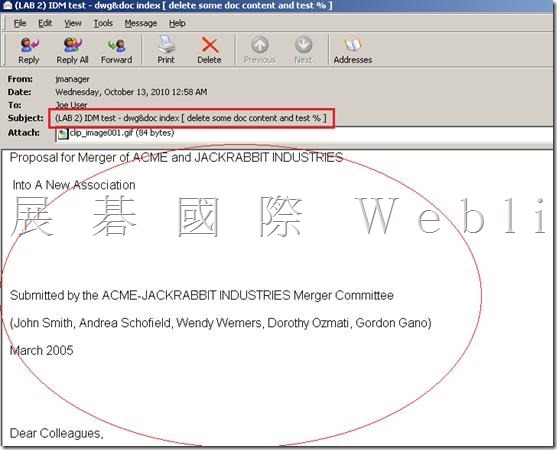
l 刪除 doc 文件的一部分內容,然後將內容貼到 mail body,測試 DLP 偵測狀況如何?

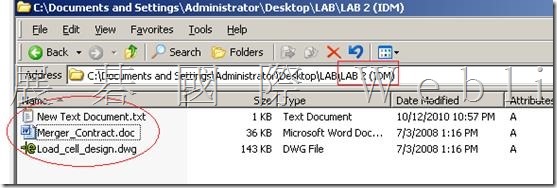
l 這是要做 Index 的資料夾

l 也可以將資料夾壓縮成 zip 檔

l 或是將資料夾分享出來

clip_image041

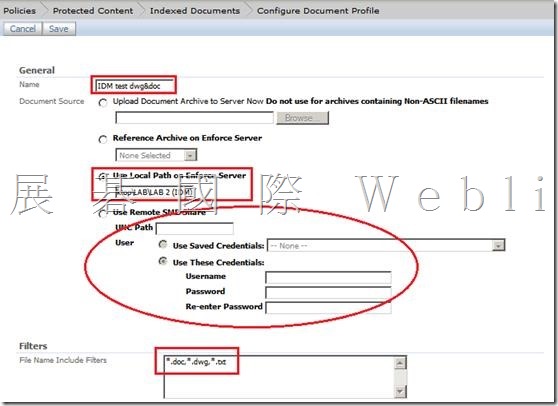
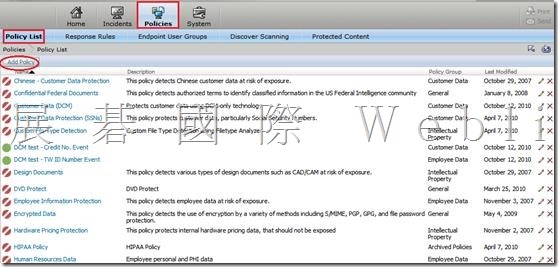
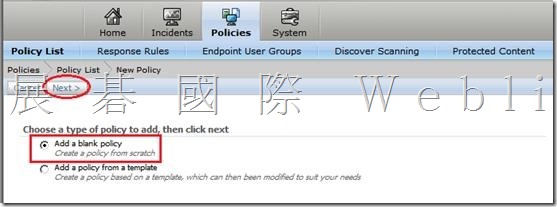
l 【Policies】→【Protected Content】→【Indexed Documents】→【Add Document Profile】

clip_image043

l Document Source 有四種選項

l 上傳 zip 檔

l 選擇已上傳至 Enforce Server 的 Archive [C:VontuProtectdocumentprofiles] (.zip)

l 選擇 Enforce Server 上的資料夾

l 選擇網路上的分享資料夾

l 只 Index 資料夾中的 *.dwg *.doc *.txt

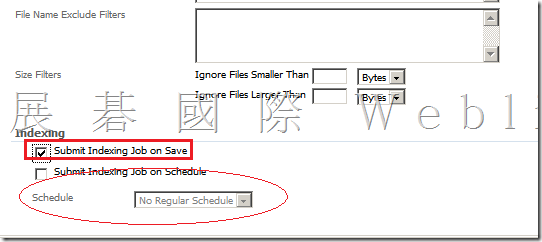
l 可以選擇 one time 的 index

l 或是排程 index

clip_image045

clip_image046

clip_image048

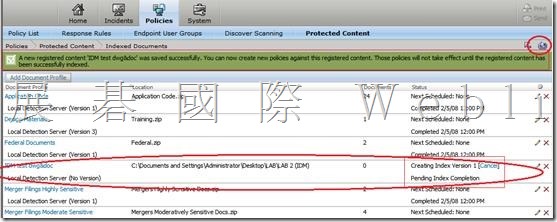
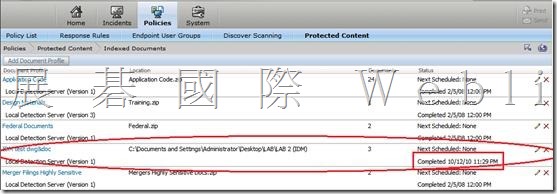
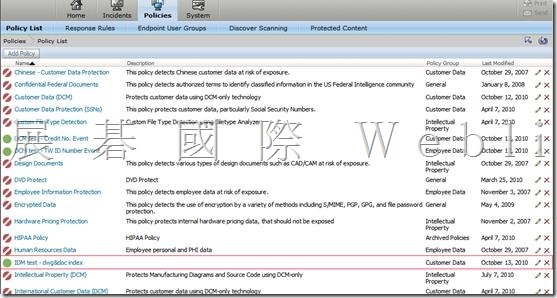
Indexed Documents 已建立

clip_image050

clip_image052

clip_image054

clip_image056

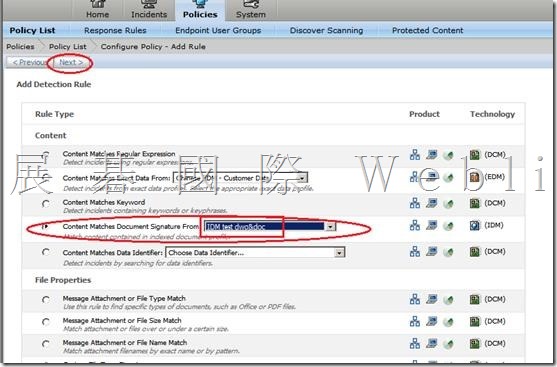
l 選擇 IDM Rule Type,並且是參照先前建立的 indexed Documents (IDM test dwg&doc)

clip_image058

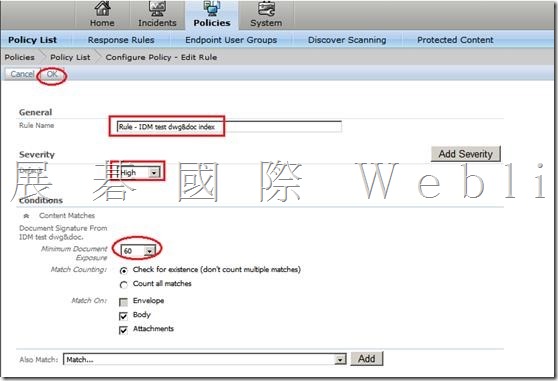
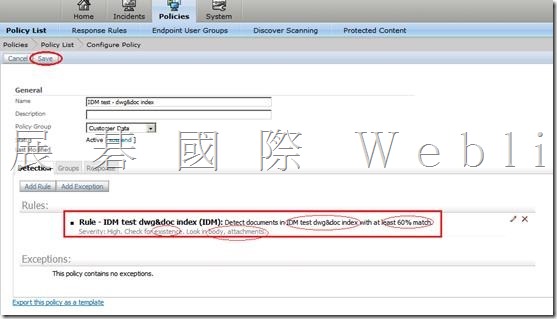
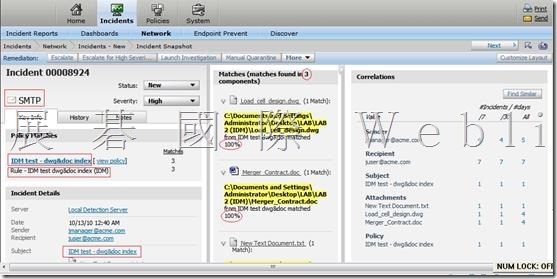
l 只要是 mail body or mail attachment相似度大於 60% 就記錄此事件

clip_image060

clip_image062

clip_image064

clip_image066

l 三個附件都 100% 符合

clip_image068

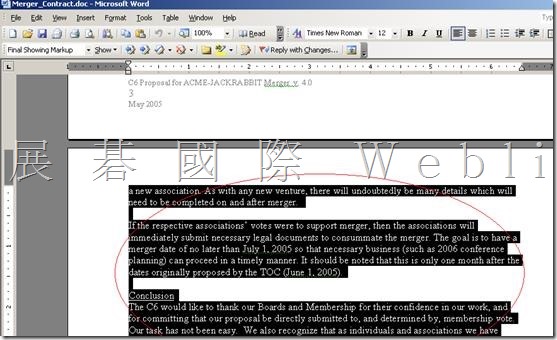
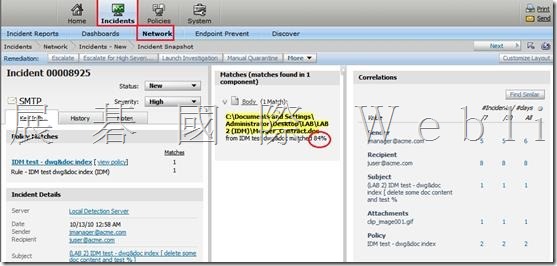
l 刪除 doc 文件的一部分內容,然後將內容貼到 mail body,測試 DLP 偵測狀況如何?

clip_image070

clip_image072

l 84%

clip_image074

Described Content Matching (DCM)

Described Content Matching (DCM)

說明:

Symantec Data Loss Prevention 提供了統稱為說明內容比對 (DCM) 的許多偵測方法。這種樣式的偵測會以關鍵字、資料類型、檔案中繼資料、通訊協定簽章、端點目的地和身分特徵等常見特性來比對資料。

您可以使用 DCM 偵測可說明的任何結構化和非結構化資料。DCM 可提供極高的準確性且易於實作,因為您不需要設定資料來源。無法收集要保護的所有資料但可以說明資料時,DCM 最為實用。通常您可以結合 DCM 和其他偵測方法,以達成精確的結果。

可用的 DCM 偵測方法

資料識別碼

使用精確特徵和資料驗證程式來比對內容。

關鍵字

使用關鍵字、關鍵詞和關鍵字字典來比對內容。

規則運算式

使用規則運算式來比對字元、特徵和字串。

檔案內容

比對檔案類型、名稱和大小。

使用者、寄件者、收件者

根據特徵來比對身分。

網路通訊協定

根據通訊協定簽章來比對網路和行動流量。

端點事件

比對端點目的地、裝置和通訊協定。

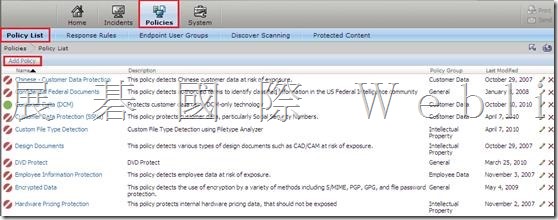
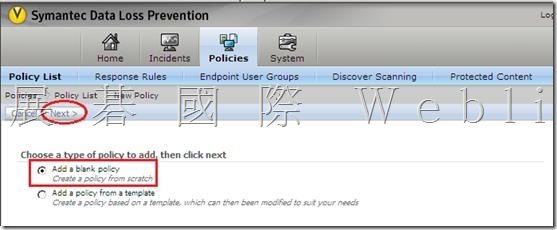
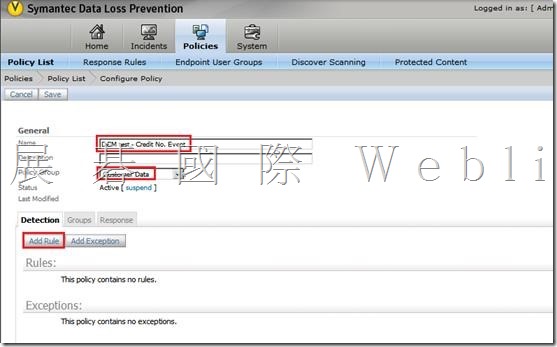
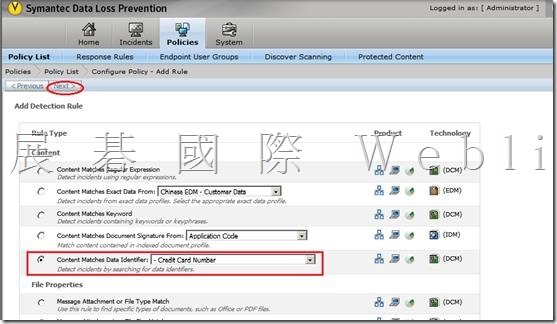
建立一個 Network Monitor Policy

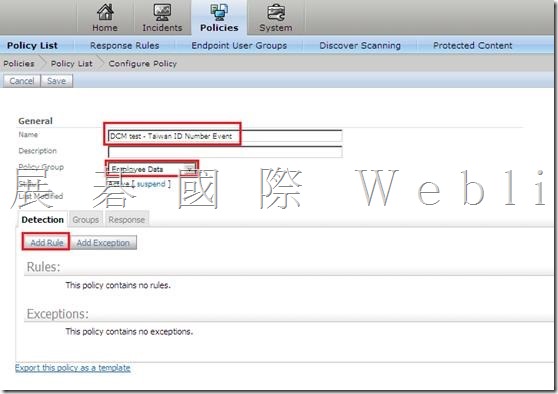
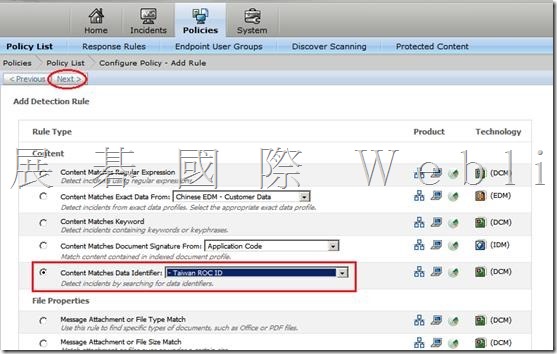
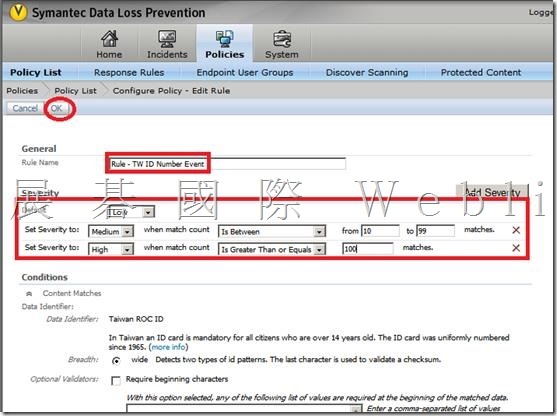
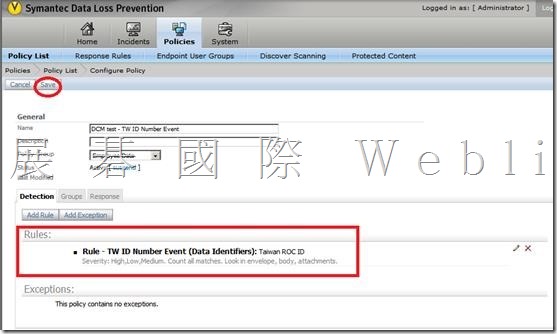
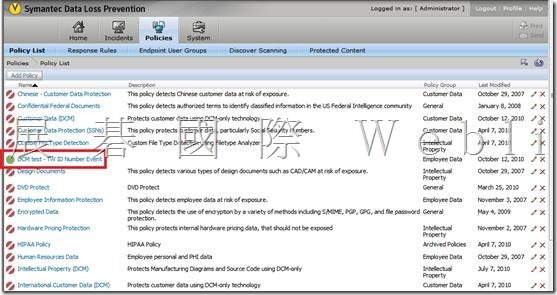
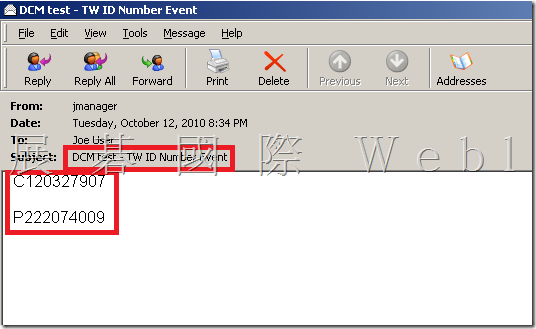
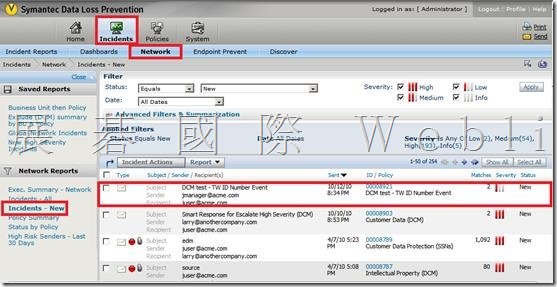
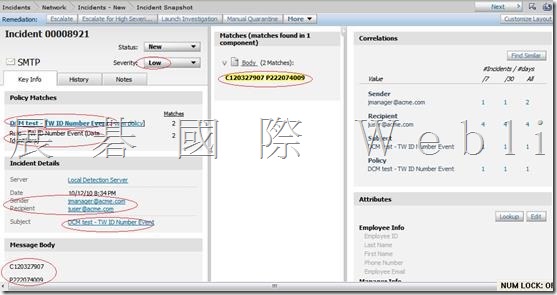
l Detect Taiwan ID event

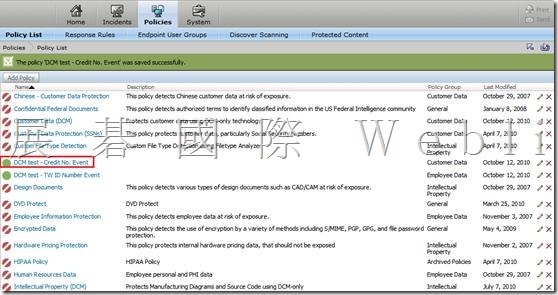
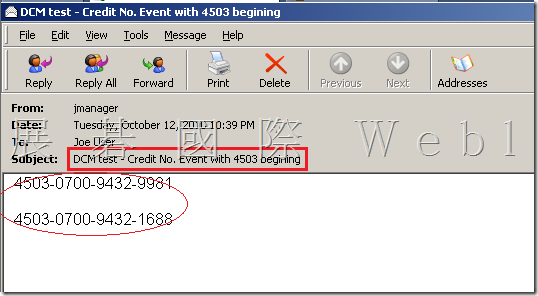
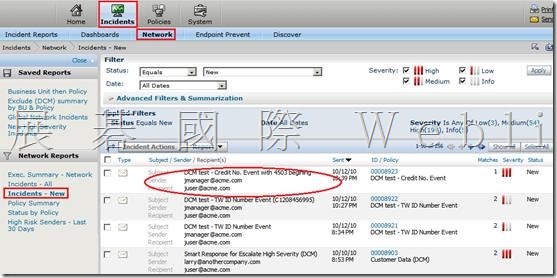
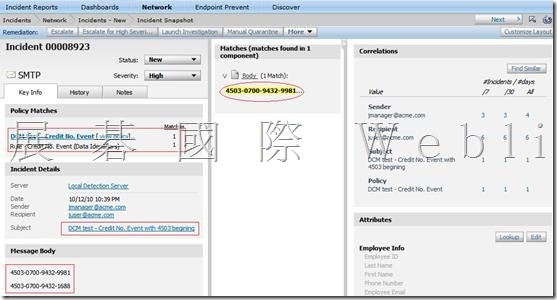
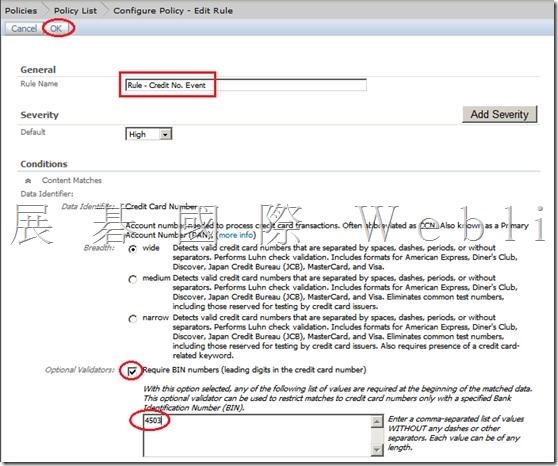
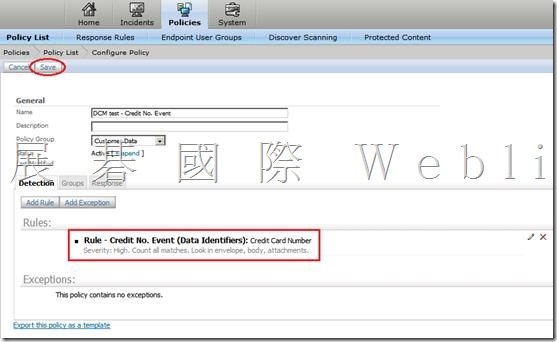
l Detect Credit Card Number (4503 開頭) event

Create a policy which detects the following patterns:

1. HK ID

2. Credit cards issued by HSBC

a. VISA First 4 digits are: 4201

b. MasterCard First 4 digits are: 5185

3. Towngas Account Number

a. nnnn-nnnn-nn

Detect Taiwan ID event

clip_image005

clip_image007

clip_image009

clip_image011

clip_image013

clip_image015

clip_image017

clip_image018

clip_image020

clip_image022

Detect Credit Card Number (4503 開頭) event

clip_image023

clip_image024

clip_image026

clip_image028

clip_image030

clip_image032

clip_image034

clip_image035

clip_image037

clip_image039

DLP 管理主控台事件刪除

DLP 管理主控台事件刪除
處理方式:
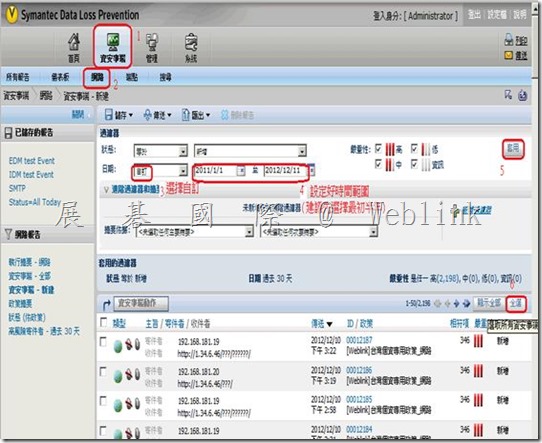
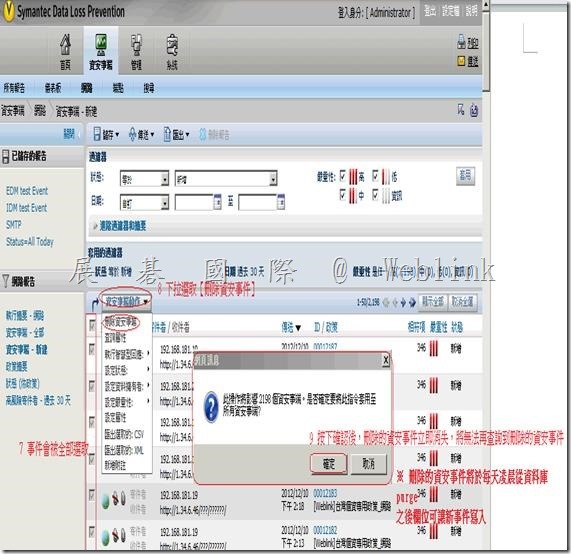
請參考下圖步驟
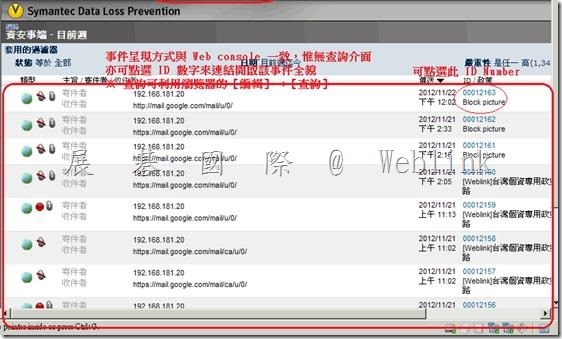
請勿點選【顯示全部】,否則會因資料過多開啟緩慢
直接選擇【全選】,之後刪除的動作會立即完成 ( 僅是 SQL Update 語法的執行,所以很快 )
clip_image002
clip_image004

DLP 11.0 upgrade to 11.6

DLP 11.0 upgrade to 11.6

11.5 function

l Tablet Prevent Detection Server

→ Support iOS 4、iOS 5

→ HTTP、HTTPS、FTP、Exchange Active Sync

→ Integration with DLP Enforce

Plicy → VPN

管理→ MDM

l Oracle → 11.2.0.2

l Meta data detection → office (link、OLE 嵌入)、PDF (作者、主旨、建立日期、修改日期)

l Additional proxy support → Websense V-Series Appliance V10000、MS TMG

升級

l 9.0 → 10.0 → 11.0 → 11.5

l

Enforce Server (不必先升級資料庫,請備份資料庫、Detection Server)

→ Download Symantec_DLP_11.5_MP1_Upgrader_Win-In.zip

→於 Enforce Server確認 Enforce Server、Detection Server 運作是否正常

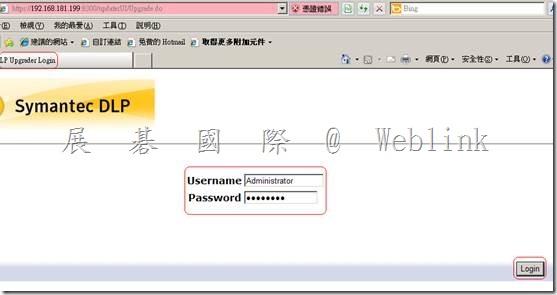
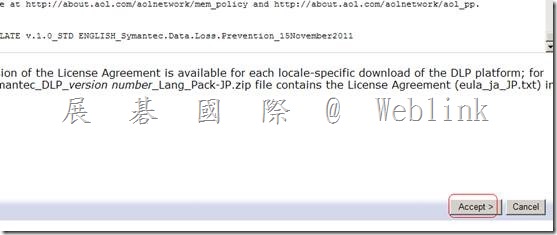
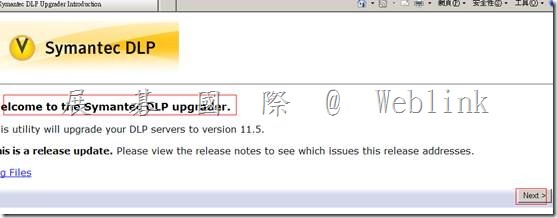
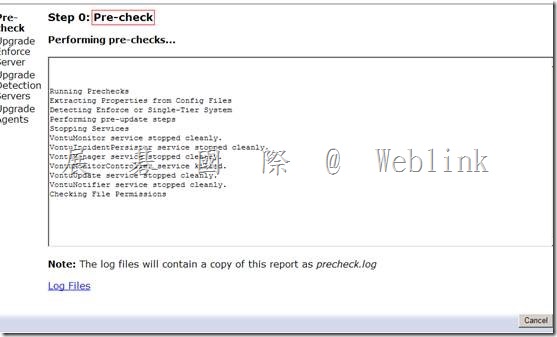
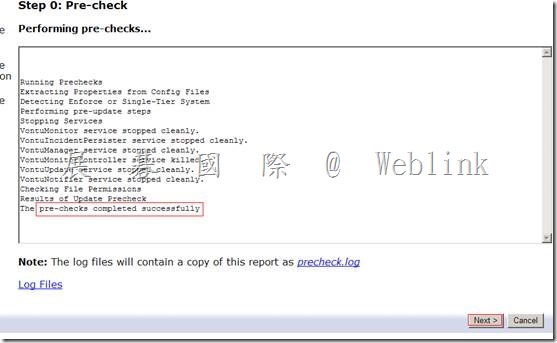
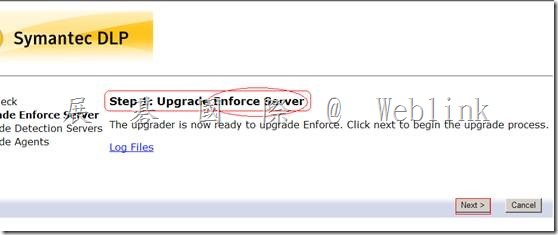
→ 於 Enforce Server 使用【升級精靈】升級 (升級精靈預設通訊號→8300)

l 在 Enforce Server 主機電腦上,使用文字編輯器開啟以下檔案:

\SymantecDLP\Protect\tomcat\webapps\ProtectManager\WEB-INF\struts-config.xml

C:\Vontu\Protect\tomcat\webapps\ProtectManager\WEB-INF\struts-config.xml

\SymantecDLP\Protect\tomcat\webapps\ProtectManager\WEB-INF\struts-config-admin.xml

\SymantecDLP\Protect\tomcat\webapps\ProtectManager\WEB-INF\struts-config-async.xml

l 在每個檔案中,找出以下這行:

<controller nocache="true" maxFileSize="500m"/>

l 在每個檔案中,將 maxFileSize 屬性的值變更為 1000m。例如:

<controller nocache="true" maxFileSize="1000m"/>

l 儲存該檔案並結束文字編輯器。

l 在 Enforce Server 主機上重新啟動 Vontu Manager 服務。

→ 【升級精靈】可同時升級 Detection Server

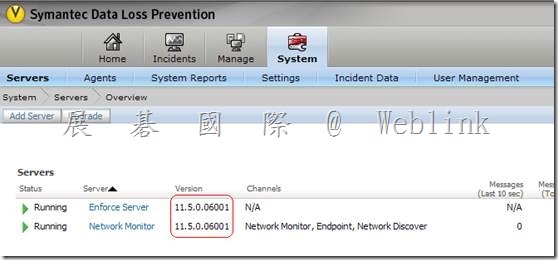
( 重新啟動 Vontu Monitor Controller 服務,Detection Server 新版號才會顯示 )

→ 套用 Endpoint Prevent Server 代理程式組態,先將群組目錄建立索引與索引排程

→ 套用 Endpoint Prevent Server 代理程式組態

→ 升級 Endpoint Agent (11.0→11.1→11.5)

→ 升級 掃描程式

→ 升級後的工作

→ 升級 WinPacp

→ 升級資料庫

→ 升級後需重上新版 Language Pack

l 注意事項

Ø Enforce Server 硬碟剩餘空間 → 50~100 G

Ø Detection Server 硬碟剩餘空間 → 300 MB

Ø 升級前請停止所有 Network Discover 掃描

Ø Enforce Server (11.5)

→ Endpoint Detection Server 11.0 (不可在此時將Endpoint Detection Server reboot)

→ 如果不小心 reboot 了,要先升級 Endpoint Agent,再升級 Endpoint Detection Server

升級實做

→【Download Symantec_DLP_11.5_MP1_Upgrader_Win-In.zip】

E:\DLP 升級\Symantec_DLP_11.5_MP1_Upgrader_Win-IN\DLP\Symantec_DLP_11_Win\11.5_Win\Upgrade_11.x_to_11.5

【11.5.0_Upgrader_Windows.jar】

clip_image002

→ 於 Enforce Server確認 Enforce Server、Detection Server 運作是否正常
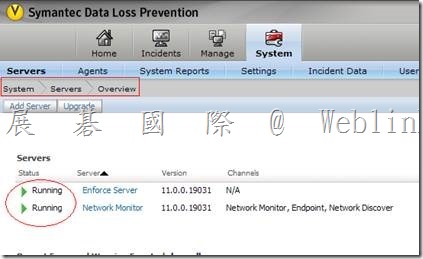
clip_image004

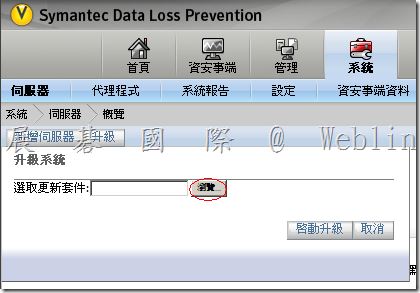
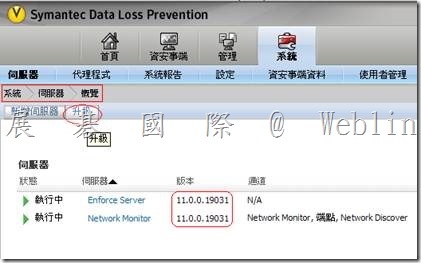
→ 於 Enforce Server 使用【升級精靈】升級 (升級精靈預設通訊號→8300)

(升級精靈預設通訊埠 → 8300,https://Enforce_server:8300)

※ 若需更改通訊埠 → 修改 C:\Vontu\Protect\config\Manager.properties

Add

Update.wizard.port=port
clip_image006

clip_image007

clip_image009

clip_image010

clip_image011

clip_image012

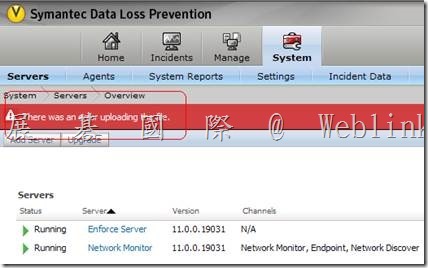
There was an error uploading the file
clip_image014

Enforce UI 上載11.5.0_Upgrader_Windows.jar,改以手動上載

Below are the steps for Manually uploading the JAR file to the Enforce Server and upgrading to 11.1.2 from 11.0:

a) Copy the upgrade JAR file 11.5.0_Upgrader_Windows.jar to the \vontu\Protect\updates directory*.

clip_image015

b) Create a new directory that is named EnforceUpgrade11.5 inside the \vontu\Protect\updates directory.

clip_image016

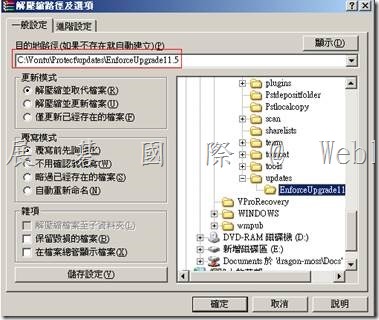
c) Extract the contents of the upgrade JAR file 11.5.0_Upgrader_Windows.jar into the EnforceUpgrade11.5 directory* (you can use Winzip or WinRAR to extract the contents of the JAR file).
clip_image018

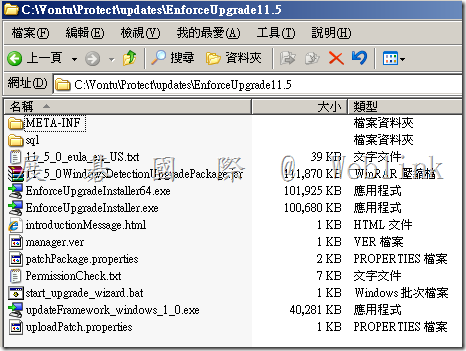
d) Run start_upgrade_wizard.bat, which is located in the \vontu\Protect\updates\EnforceUpgrade11.5 directory.
clip_image019

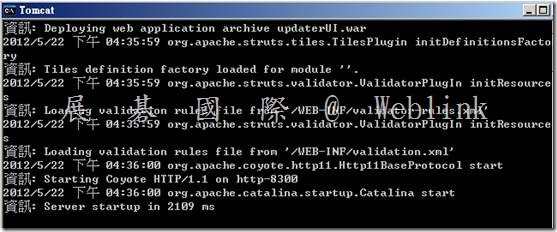
e) Wait a few minutes for the Upgrade Wizard server to start. This will open a command window with Tomcat as Title (make sure that you don’t close this window).
clip_image020

16:35~

clip_image022

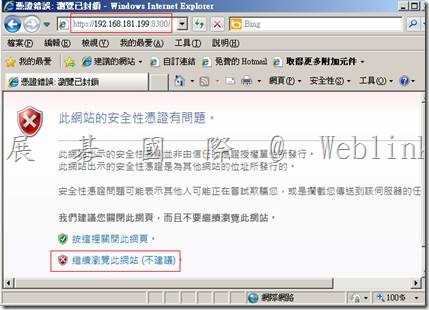
f) Open a Web browser and go to: https://Enforce_server:8300

(Enforce_server is the name or IP address of the computer having Enforce server)

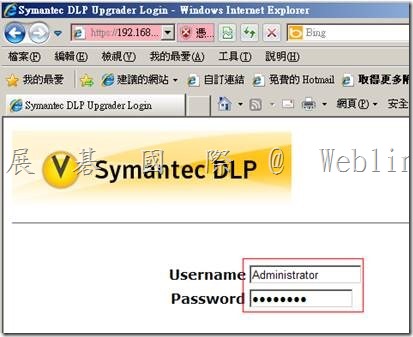
Continue using the standard upgrade procedures. See “Performing an upgrade with the Upgrade Wizard” in the upgrade guide.

clip_image024

clip_image026

clip_image028

clip_image030

clip_image032

clip_image034

clip_image036

clip_image038

clip_image040

clip_image042

[ERROR] com.vontu.updater.vontu8.FilePermissionChecker:

File “C:\Vontu\Protect\lib\native\wrapper.dll" is inaccessible.: java.io.FileNotFoundException: C:\Vontu\Protect\lib\native\ wrapper.dll (The process cannot access the file because it is being used by another process)
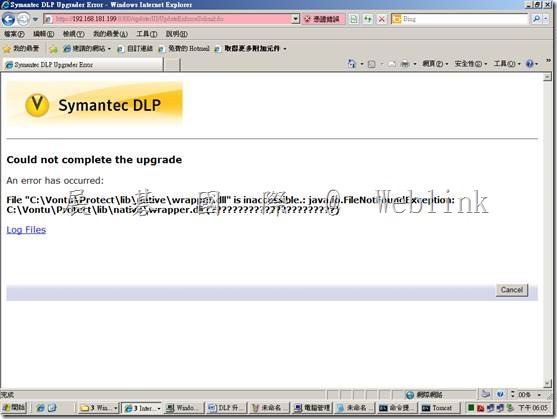
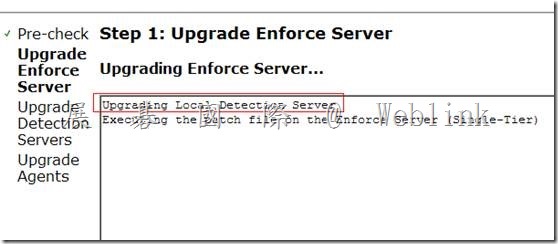
clip_image044

clip_image046

C:\Vontu\Protect\updates\EnforceUpgrade11.5

VontuEnforceBackup.zip

C:\Vontu\Protect\updates\update-id-1337682237322

VontuDetectionBackup.zip
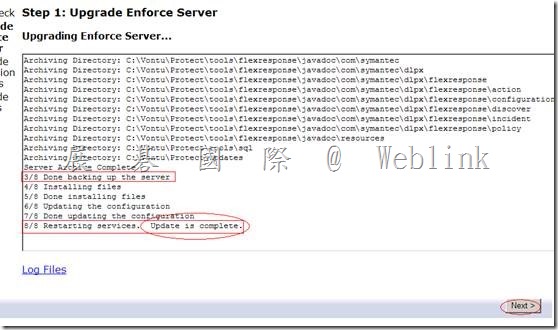
clip_image048

→ 【升級精靈】可同時升級 Detection Server

( 重新啟動 Vontu Monitor Controller 服務,Detection Server 新版號才會顯示 )
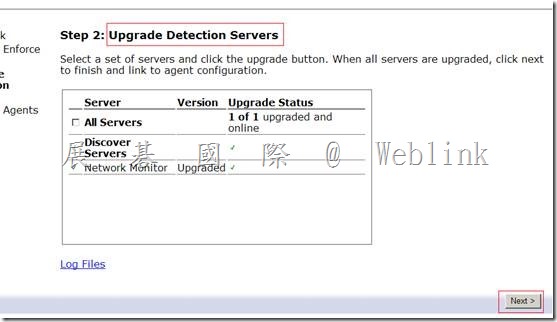
clip_image050

clip_image052

clip_image054

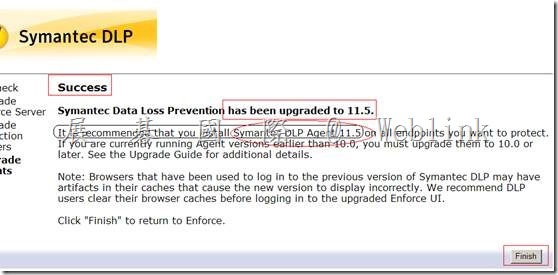
遠端 Detection Server

( 重新啟動 Vontu Monitor Controller 服務,Detection Server 新版號才會顯示 )
clip_image056

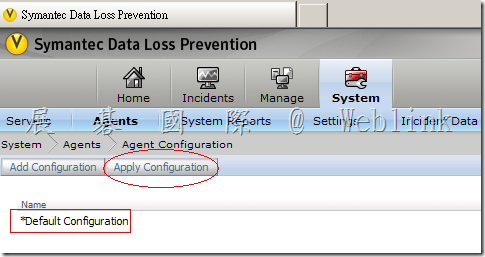
→ 套用 Endpoint Prevent Server 代理程式組態,先將群組目錄建立索引與索引排程

→ 套用 Endpoint Prevent Server 代理程式組態
clip_image057

clip_image059

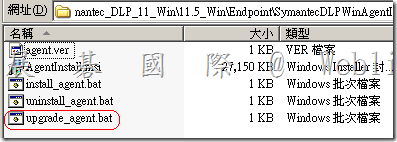
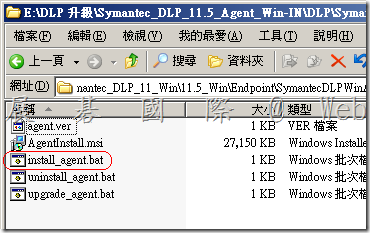
→ 升級 Endpoint Agent (11.0→11.5) or (11.0→11.1→11.5)

(11.0→11.5)
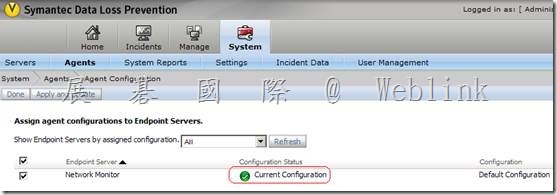
clip_image060

(11.0→11.1→11.5)

clip_image061

→ 升級 掃描程式

→ 升級後的工作

→ 升級 WinPacp (4.1.2)

→ 升級資料庫

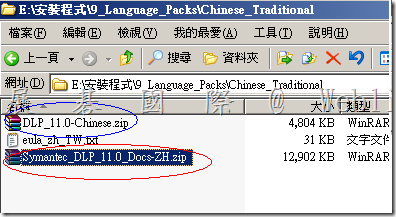
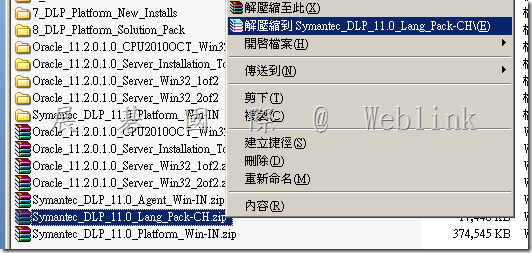
→ 升級後需重上新版 Language Pack
clip_image062

clip_image063

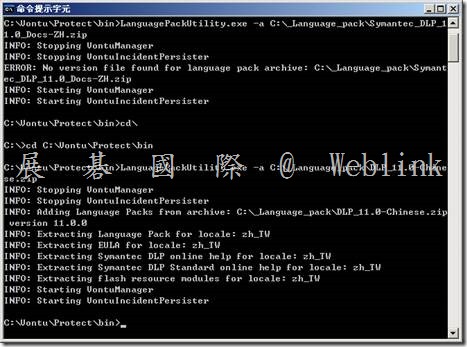
在C:\ 新增 _Language_pack 資料夾

將DLP_11.5-Chinese.zip 複製到 C:\_Language_pack

Cd C:\Vontu\Protect\bin

LanguagePackUtility.exe -a C:\_Language_pack\DLP_11.5-Chinese.zip

clip_image064

clip_image066

clip_image068

安裝 DLP Endpoint Agent 12.0.1 後 IE temp 目錄下產生了很多 DLP*.TMP 檔 造成 IE 開啟緩慢

image

  • 【安裝 DLP Endpoint Agent 12.0.1 後 IE temp 目錄 下產生了很多 DLP*.TMP 檔 造成 IE 開啟緩慢】

Example:Windows 7、Windows 8、Windows 8.1 目錄

(C:\Users\ [登入名稱] \AppData\Local\Microsoft\Windows\Temporary Internet Files)

  • 刪除 DLP*.TMP 後,IE 開起即恢復正常,但之後 DLP*.TMP 又會產生


  • 已確認此現象與 C:\Program Files\Manufacturer\Endpoint Agent\temp" file 過大無關


  • Forum 提到:這是一個 Symantec 目前已經發現的問題,不過 fix 檔目前沒有公開,需建案取得相關的 fix

以下是 Forum 的連結與內容 

http://www.symantec.com/connect/forums/dlp-endpoint-crea-demasiados-archivos-temporales-en-carpeta-temp

  • 請下載 Hotfix_12.0.1101_Windows.zip ,解壓後參照 Hotfix Readme 來執行用戶端 Endpoint Agent 的升級
 

  • Hotfix Readme

Fixes in this Hotfix:
———————
3411202 : Dlp temp files created by IE HTTPS hook are not deleted after scanning

    More infomation :
    The internet explorer hook generates false requests that never make it to agent. As agent is supposed to delete the requests, the temporary files created for those requests are never deleted.

     
    Contents:
    ————
    AgentInstall.msi
    AgentInstall64.msi
    Agent Tools (not listed here)
     
     
    Constraints:
    ————
    1. This hotfix can only be installed in place of Endpoint Agent 12.0.1. Also it is to be used with a 12.0.1 server.
    2. These files are from the Endpoint Agent 12.0.1 hotfix build 12.0.1101.01001


    To Install the Endpoint Agent Hotfix:
    —————————————-
     
    1. Find the appropriate Agent to install (in /Endpoint/Win32/ or /Endpoint/x64/)
     
    2. In the Software Distribution package give the following command line for fresh installation of DLP agent (新安裝的用戶)

    msiexec /i AgentInstall.msi /q INSTALLDIR="%ProgramFiles%\Manufacturer\Endpoint Agent\" ENDPOINTSERVER="hostname" PORT="8000″ KEY="" SMC="hostname" SERVICENAME="EDPA" WATCHDOGNAME="WDP"
     
    3. If you want to upgrade agent from 12.0.1 then in software distribution package command line you need to give following (已安裝的用戶)

    msiexec /i AgentInstall.msi /q INSTALLDIR=“%ProgramFiles%\Manufacturer\Endpoint Agent\" ENDPOINTSERVER="hostname" PORT="8000″ KEY="" SMC="hostname" SERVICENAME="EDPA" WATCHDOGNAME="WDP" REINSTALL=ALL REINSTALLMODE=vomus

【DLP Endpoint Agent Pull 提取日誌】

【DLP Endpoint Agent Pull】

【DLP Endpoint Agent Pull 提取日誌】

Additionally please provide logs from the Endpoint Agent via the Enforce UI:

Go to System -> Agent Overview

至【系統】→【代理程式】→【概覽】

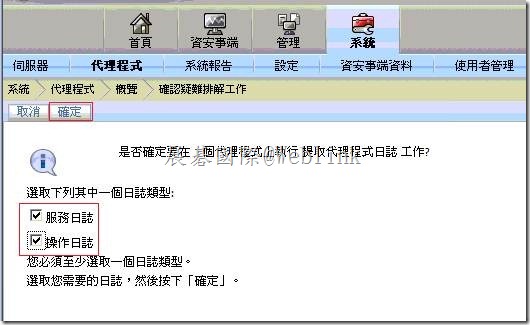
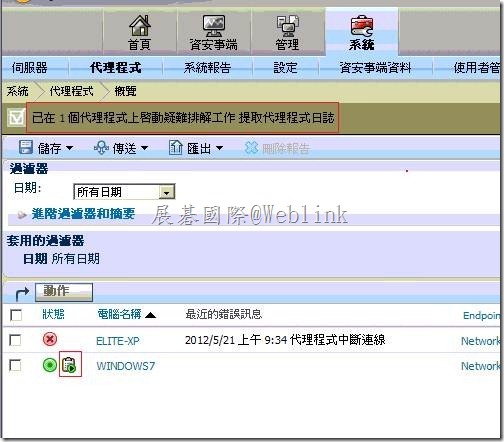
Select the agent you want and from the Actions pull down, select Pull Logs.

選擇那台需要 除錯的用戶端電腦 → 點選【動作】→ 【提取日誌】

clip_image002

Select both Services logs or Operational logs and click OK

勾選【服務日誌】→【操作日誌】,並按下【確定】

clip_image004

clip_image006

Next, the logs need to be pulled from the Endpoint Server to the Enforce Server

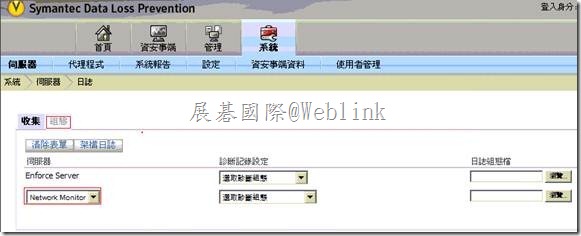
Go to System -> Servers -> Logs

Select the Endpoint Server from the drop down and check the Agent logs box.

至【系統】→【伺服器】→【日誌】→【組態】→【下拉選擇您的偵測伺服器】

clip_image008

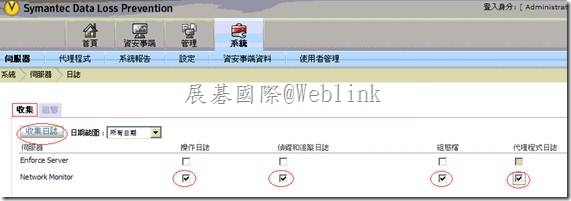
至【系統】→【伺服器】→【日誌】→【收集】→【勾選 操作日誌、偵錯和追蹤日誌、組態檔、代理程式日誌】

並按下【收集日誌】

Then click on the Collect Logs button.

clip_image010

This will retrieve the logs from the Endpoint Agent.

Download the logs and send them to us by replying to this mail with the attachment.

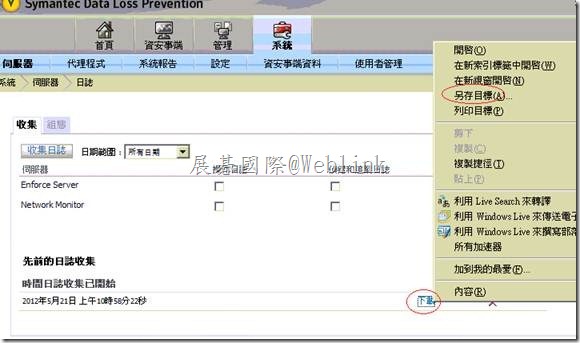
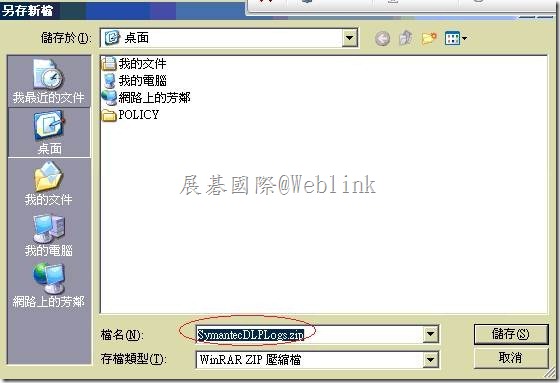
一段時間後,按下右上角的重新整理圖示,帶畫面下方出現【下載】連結時,下載【SymantecDLPLogs.zip】

clip_image012

請將 SymantecDLPLogs.zip 以附件的方式提供給我們
clip_image014

Symanetc DLP 偵測從他人分享資料夾複製含個資檔案回自己電腦

Symanetc DLP 偵測從他人分享資料夾複製含個資檔案回自己電腦【可被偵測】

1. LAB

PC A      192.168.181.20 ( 有安裝 DLP Endpoint Agent )

PC B      192.168.181.16 ( 沒有安裝 DLP Endpoint Agent )


PC A從PC B分享資料夾複製含個資檔案會回自己電腦【可被偵測】

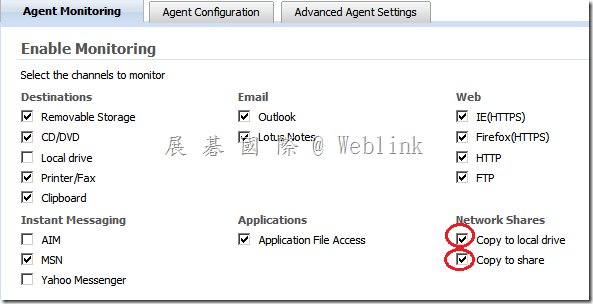
前提是

1.下圖兩個選項需勾選

2. PC A需安裝 DLP Endpoint Agent


clip_image001

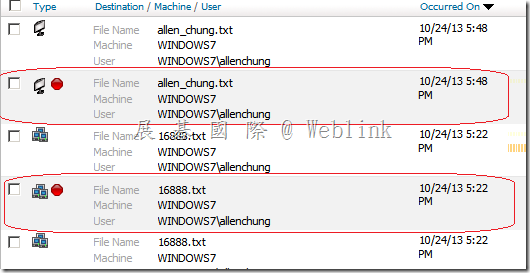
2. LAB 測試   PC A從PC B分享資料夾複製含個資檔案會回自己電腦【可被偵測】

PC A      192.168.181.20 ( 有安裝 DLP Endpoint Agent )

PC B      192.168.181.16 ( 沒有安裝 DLP Endpoint Agent )

image

3. PC A將自己含個資檔案複製到PC C分享資料夾【可被偵測】

PC A      192.168.181.20 ( 有安裝 DLP Endpoint Agent )

PC C      192.168.181.1 ( 沒有安裝 DLP Endpoint Agent )

image


clip_image004

整合AD驗證登入使用者操作手冊

clip_image002

整合AD驗證登入使用者操作手冊

l 使用時機與說明:

整合 Active Directory 以進行使用者驗證

您可以架構 Enforce Server 使用 Microsoft Active Directory 進行使用者驗證。

在切換至 Active Directory 驗證後,您仍須在 Enforce Server 管理主控台中定義使用者。如果您在「管理主控台」中輸入的使用者名稱與 Active Directory 使用者名稱相符,則系統會將任何新的使用者帳戶與 Active Directory 密碼產生關聯。在系統中已建立使用者帳戶之後,可以切換至 Active Directory 驗證。在切換之後,只有與 Active Directory 使用者名稱相符的現有使用者名稱才會保持有效。

使用者在登入時,必須使用自己的 Active Directory 密碼。請注意,所有的 Symantec Data Loss Prevention 使用者名稱仍要區分大小寫,儘管 Active Directory 使用者名稱不區分大小寫。在 Symantec Data Loss Prevention 中建立使用者名稱之後,可以切換至 Active Directory 驗證。不過,使用者在登入時,仍然必須使用區分大小寫的 Symantec Data Loss Prevention 使用者名稱。

l 操作步驟與說明:

1. 請確認 Enforce Server 主機的時間與 Active Directory 伺服器是否同步。

請確保 Active Directory 主機上的時鐘已與 Enforce Server 上的時鐘同步,時間差異不超過 5 分鐘。

2. (僅限 Linux) 確定 Enforce Server 主機上已安裝下列 Red Hat RPM:

krb5-workstation

krb5-libs

pam_krb5

3. 建立 krb5.ini (如果是 Linux,請建立 krb5.conf) 組態檔,以提供關於 Active Directory 網域結構和 Active Directory 伺服器位址的 Enforce Server 資訊。

範例:

[libdefaults]

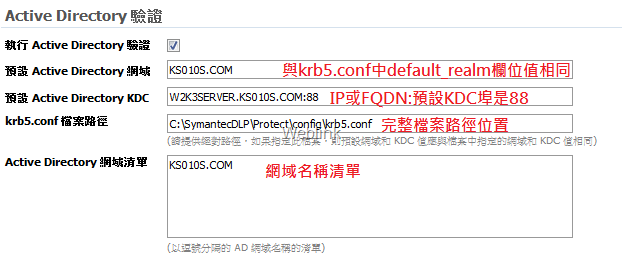
default_realm = KS010S.COM

[realms]

KS010S.COM = {

kdc = KS010S.COM

}

4. 設定DLP整合資訊:

clip_image003

5. 重新啟動服務即可使用:

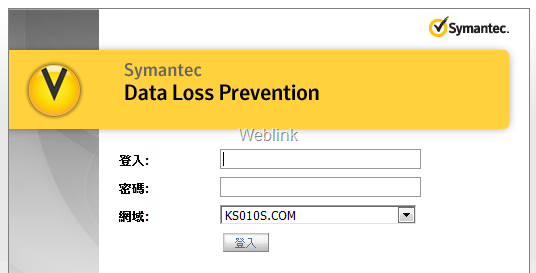
clip_image004